01 - General

Sew Your Style: A Beginner’s Guide to Sewing Fashionable Clothes

Learn the basics of hand sewing, machine stitching, and garment-making techniques to create everything from everyday outfits to stunning couture pieces.

Introduction

So, you've decided to dive into the world of sewing - congratulations.

Sewing your own clothes is a rewarding skill that lets you create garments tailored to your style.

This guide is written for beginners with little to no experience, so don't worry if you're not sure how to sew clothes yet.

We'll start from the very basics (like hand stitching) and work our way up to using a sewing machine.

Along the way, you'll learn fundamental sewing techniques and get an overview of garment construction. 

By the end, you'll understand how to go from a pile of fabric to a finished piece of clothing.

The tone here is friendly and encouraging - consider this article your sewing buddy, cheering you on as you take your first stitches.

Let's get started on this journey of sewing for beginners!

Introduction to Hand Sewing

pins in pincushion

Hand sewing is a great way to begin your sewing adventure, and it requires only the simplest tools. In fact, all you need is a needle and thread to start sewing by hand - no fancy equipment of advanced skills needed. By threading a needle and making a few basic stitches, you can get a feel for how fabrics join together.

Hand sewing might sound old-fashioned, but it's an essential foundation for understanding stitch formation and fabric control.  It's also incredibly accessible. - you can practice almost anywhere, and it costs next to nothing to get started.

When you sew by hand, you have a lot of control over each stitch. This makes hand sewing perfect for small repairs, delicate sewing tasks, and adding fine details.  Many beginners find that hand stitching is almost meditative - the rhythmic movement of the needle can be calming.

It's worth learning a few basic hand stitches such as the running stitch (a simple in-and-out stitch for seams or basting) and the backstitch (a strong stitch for seams that mimics machine stitching). These stitches will come in handy even after you graduate to a sewing machine.

Hand sewing does have some drawback to be aware of: it's time-consuming and generally much slower than using a machine, so larger projects can take a long time. 

Also, some hand-sewn seams usually aren't as strong as machine-sewn seams. For example, the seam of a hand-sewn skirt might not hold up to much strain or frequent washing as machine-stitched seams.

But for learning and for certain tasks (like sewing on buttons or finishing an inside lining invisibly), hand-sewing is ideal. In fact, most sewists use a combination of hand and machine methods in their projects.

The key point here is that hand sewing is an excellent place to start: it teaches you how fabric behaves and how stitches are formed, and it gives you a feel for guiding needle and thread through cloth - skills that will benefit you when you move on to machine sewing.

Before moving on, try a small hand-sewing project. For instance, you could hem a simple scarf by hand or sew a button onto a scrap of fabric. Practicing these basics will build your confidence.

Remember, every expert fashion designer or tailor started with that first humble stitch. 

Enjoy the process and don't rush - after all, part of the joy of sewing is the journey, not just the destination!

Mastering a Sewing Machine

person using sewing machine in tilt shift lens

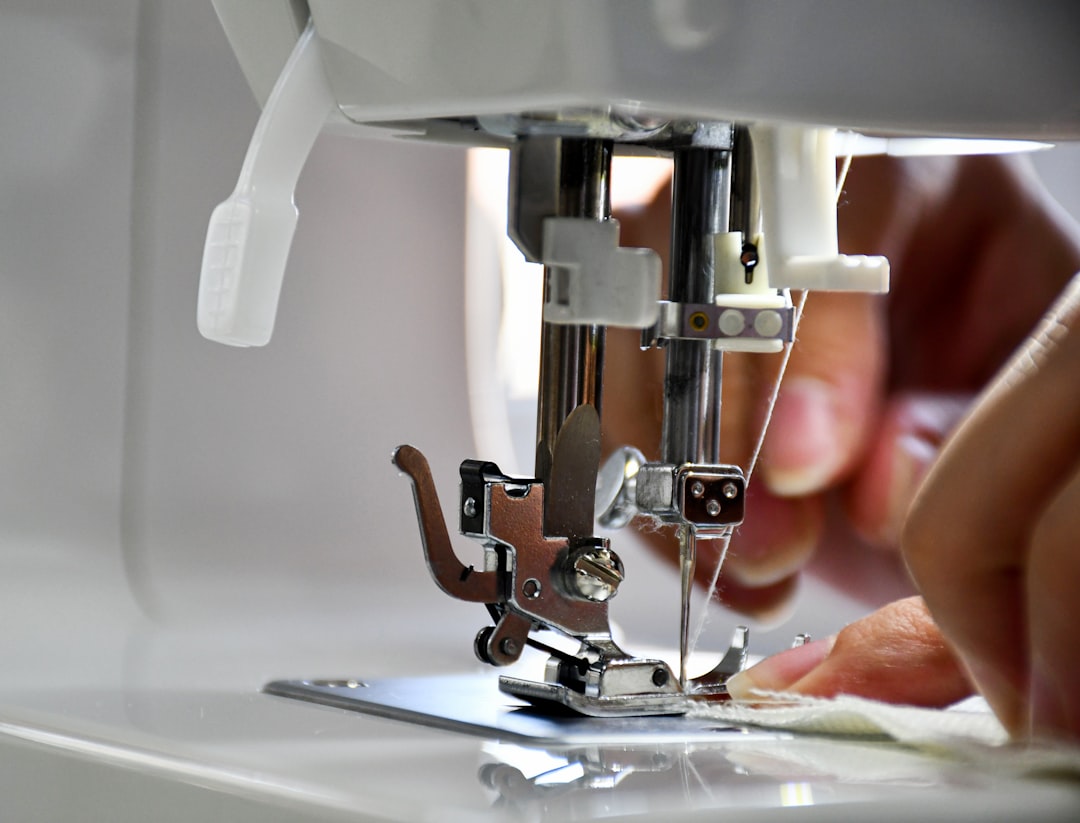
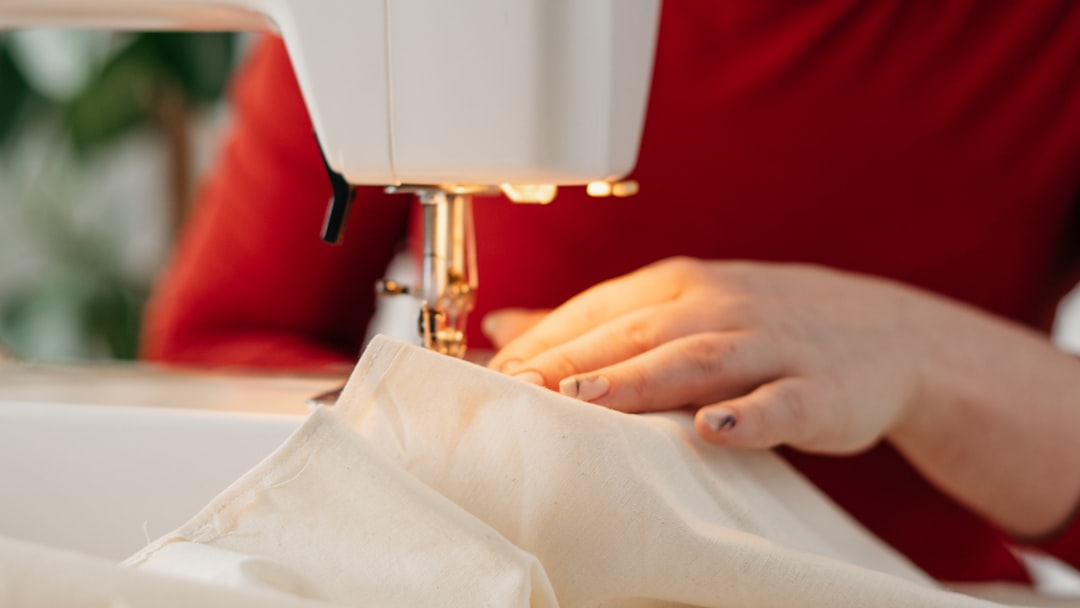
Once you're comfortable with the idea of sewing and have tried a bit of hand stitching, you'll likely want to upgrade to using a sewing machine.

For beginners, a sewing machine can seem a little intimidating with all its parts (needles, bobbins, dials, and pedals), but with a bit of practice it will become your best friend in garment making.

The big advantage of machine sewing is speed and strength: a sewing machine can stitch fabric much faster than you can by hand, and it creates durable, even seams that hold up well.

In other words, a task that might take you hours by hand can often be done in minutes on a machine, and the result will usually be a sturdy seam with consistent stitches.

Learning to use a sewing machine is like learning to drive a car - at first there are many controls, but soon it becomes second nature. 

Start by getting to know your machine's basic parts: the needle, presser foot, feed dogs, bobbin, and thread tensions knobs. You machine's manual will be a great help in showing you ow to wind a bobbin (the little spool that feeds the bottom thread), thread the machine properly, and select different stitches.

Don't worry, you don't have to master every feature at once. Begin with the simplest straight stitch. Practice on scrap fabric, sewing straight lines, curves, and pivoting at corners. This will help you get comfortable controlling the speed (using the foot pedal) and guiding the fabric. It’s normal to feel a bit awkward at first – go slowly until you gain confidence.

One common beginner question is whether to learn hand sewing vs. machine sewing first. There’s no strict rule, but keep in mind that most clothing construction is done by machine. Hand sewing vs. machine sewing isn’t an either/or choice – you’ll use both. You might sew a entire garment with your machine, then hand-sew a few finishing details. If you started with hand sewing, you’ve already built a good foundation.

Now, as you learn the machine, you’ll discover it opens up a world of possibilities. A sewing machine can handle long seams and heavy fabrics that would be tough on your hands. It also offers various stitch types (like zigzag for finishing edges or stretch stitches for knits) at the turn of a dial.

Be patient with yourself as you learn to use the sewing machine. There will be a learning curve for example, figuring out the right thread tension or remembering to lower the presser foot before sewing (a mistake every beginner makes!).

Don’t be afraid to re-thread the machine or adjust settings when stitches don’t look right.

And always prioritize safety: keep your fingers a safe distance from the needle, and switch off or unplug the machine when changing the needle or doing maintenance.

With practice, operating the machine will feel more and more natural. Think of it as your creative tool – much like a painter uses a brush, you’ll use your sewing machine to create garments.

Before you know it, you’ll be zipping along seams and even experimenting with interesting techniques that the machine makes possible.

Essential Sewing Techniques

white tape measure and gray scissors

Now that you have a hand-sewing foundation and a growing confidence with the machine, let’s talk about some essential sewing techniques every beginner should learn.

Sewing a garment isn’t just about stitching a seam – there are a bunch of little skills and steps that go into making a piece of clothing. In fact, no matter what you sew, you’ll find yourself using the same core set of techniques over and over. 

Here are the key skills and tasks you’ll be practicing as you start sewing clothes.

Measuring and Cutting Fabric

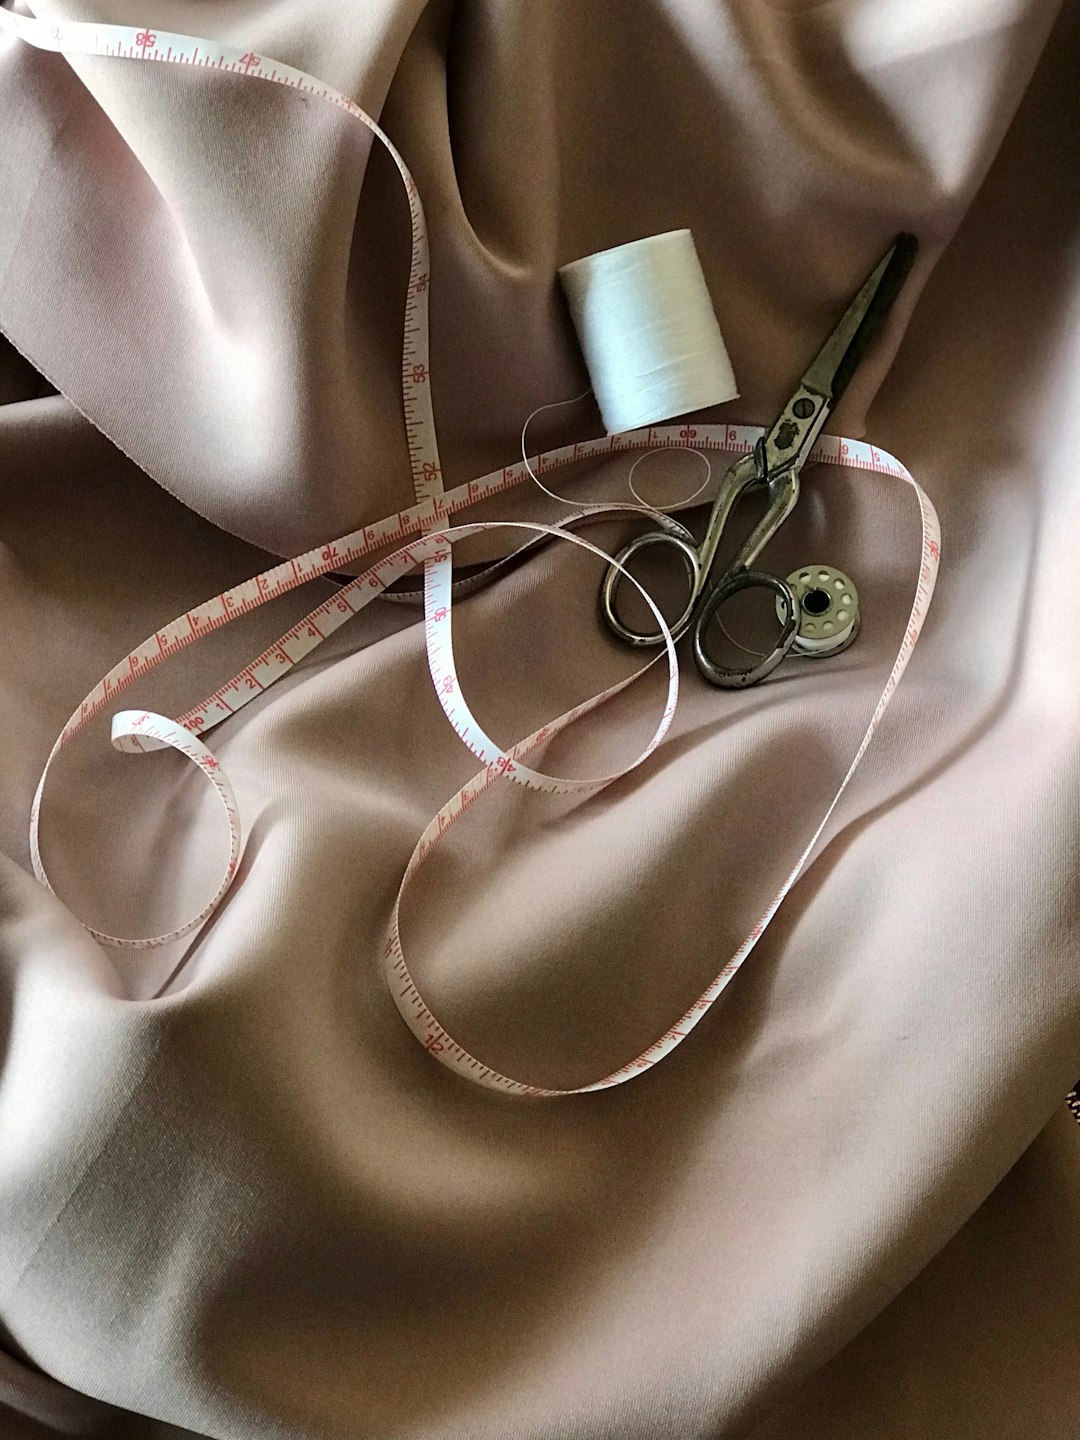
Every project starts with measuring and cutting your fabric pieces. This includes using tools like measuring tape, rulers, or patterns to mark out the pieces you need.

Cutting accurately is vital – a good pair of fabric scissors (kept sharp and used only for fabric) will be your best friend.

You may work with a paper pattern or simple measurements for rectangular pieces. Take your time with cutting and double-check you’re following the pattern layout or grainline instructions, as given. Accurate cutting sets the stage for everything else.

Marking and Pinning

After cutting, you’ll need to transfer important markings from your pattern onto your fabric (for example, where a dart should be sewn, or where a pocket goes).

Beginners often use fabric chalk or disappearing ink pens for this.

Once your pieces are marked, you’ll pin them together before sewing. Pinning (or using clips) aligns the fabric pieces and holds them in place. Align edges carefully and use enough pins to keep things from shifting. Think of pinning as a way to preview the seam before you stitch it. It’s a small step that prevents big mistakes. (And remember to pull out or reposition pins as you sew so you don’t hit them with the needle.)

Basting and Temporary Stitches

Sometimes you’ll want to hold pieces together with temporary stitches before the final sewing.

Basting is a technique where you make long, easily removable stitches (by hand or using a long machine stitch) to test fit or keep slippery layers in place. For example, you might baste a sleeve into a shirt to check how it hangs before permanently stitching.

Basting by hand with a simple running stitch is quick and useful for tricky fabrics that might slide around under the machine. It’s like putting in a placeholder seam that you can either sew over or remove later.

Sewing Seams with Allowances

A seam is where two pieces of fabric are sewn together.

As a beginner, you’ll mostly use the basic straight stitch on your machine to sew seams.

One term you’ll encounter is seam allowance – this is the border between the edge of the fabric and the line of stitching.

Garment patterns typically have a seam allowance (commonly 1.5 cm or 5/8 inch) built in.

It’s important to sew at the correct distance from the edge so your garment ends up the right size.

Most sewing machines have guide markings to help you keep the seam straight.

Practice sewing consistent seam allowances on scrap fabric. If you sew exactly the same distance from the edge, your seam will be straight and your pieces will match up correctly.

This is a fundamental technique to master for neat garment construction.

Pressing and Seam Finishing

Here’s a pro tip that might surprise beginners: ironing (pressing) is as important as sewing!

Pressing means using an iron to flatten seams and shape the garment as you sew. After sewing a seam, you typically press it – either “open” (splitting the seam allowance and pressing it flat to either side) or to one side, depending on the garment.

Pressing each seam may sound tedious, but don’t skip it – pressing sets the stitches and gives the garment structure, making it look polished and professional.

In addition to pressing, you’ll want to finish your seams so the raw fabric edges don’t unravel. There are several ways to finish seams: you can use a zigzag stitch along the edge, trim with pinking shears (scissors that cut a zigzag pattern), or if you have access to a serger (overlock machine) you can professionally bind the edges. For now, a simple zigzag stitch on your regular sewing machine is an easy way to secure those raw edges.

Learning to press and finish seams is one of those sewing techniques that really elevates the quality of your finished piece. It’s the difference between a garment that screams “homemade” and one that looks clean and well-made.


These essential techniques – measuring, cutting, marking, pinning, basting, sewing, pressing, and finishing – form the backbone of garment construction.

As you practice, you’ll get better and faster at each step. Don’t worry if it feels like a lot to remember at first. With each project, these steps will become more routine. Soon you’ll be pinning and pressing like a pro without a second thought!

Understanding Garment Assembly

person in white dress shirt

Now, how do all these skills come together to actually make a piece of clothing?

This is where we talk about garment construction (or garment assembly).

In simple terms, garment assembly is the process of turning a bunch of flat fabric pieces into a 3D wearable item. It can feel like solving a puzzle the first few times, but fortunately, you usually have a guide: most people use sewing patterns or instructions that tell you exactly how to assemble the garment. Your pattern instructions will tell you which pieces need to be sewn to each other and in what order.

As a beginner, it’s best to follow these directions step by step. Over time, you’ll start understanding the logic behind them.

One crucial concept in assembly is knowing how to align your fabric pieces correctly.

Typically, you place pieces “right sides together” when sewing a seam. The “right side” of fabric is the side that will face outward on the finished garment (often it’s the printed or brighter side), and the “wrong side” is the inner side.

Sewing right sides together means the nice sides of the fabric face each other and the seam stitching will be on the inner, hidden side once you turn the garment out. This way, the line of stitching ends up on the inside of the garment where it’s hidden.

This is almost always what you do for regular seams (exceptions exist, like French seams, but you can save those for later). So when your pattern says “place pieces right sides together and stitch,” make sure the correct sides of the fabric are facing each other.

It’s a simple tip, but it saves you from the classic beginner mistake of sewing pieces wrong-side-out!

As you start putting a garment together, you usually follow a logical sequence.

While every project is a bit different, here’s a typical flow of garment construction for many sewing patterns: you begin by sewing the small detail areas and preparatory steps, then join the major sections, and finally finish up with things like hems and closures.

For example, many patterns have you do any shaping steps first – things like darts, pleats, or tucks (which create shape in the garment) are often sewn at the beginning.

If there are pockets to add or perhaps a zipper, these might be attached early on as well (it’s easier to put pockets on a flat piece of fabric before the whole garment is assembled).

Once these details are done, you then sew the main seams that join the big pieces together – for a shirt, that might mean sewing the shoulder seams and side seams; for pants, the inseams and crotch seam; for a dress, the bodice seams, and so on.

As you sew each seam, remember to press it as we discussed.

Little by little, the garment starts to take shape.

After the main pieces are together, you’ll attach things like sleeves, collars, or waistbands if your project has them. These can be a bit tricky because they often involve aligning curves or easing one piece to fit another.

Take your time with these steps, pin generously, and even baste if needed to check the placement before the final stitching.

It’s perfectly normal to scratch your head a bit when setting in a sleeve or attaching a collar for the first time – just follow the instructions and trust that it does come together (and yes, use your seam ripper to gently redo it if it’s not quite right the first time).

Finally, you’ll do the finishing steps of the assembly process.

Typically, this includes sewing any remaining hems (like the bottom of a shirt or dress, or sleeve hems) and adding closures.

Hems and closures are usually the last steps in garment construction – for instance, you might sew the hem and then make buttonholes and attach buttons at the very end.

If your project has a zipper (like the back zipper of a dress), instructions might have you put it in near the end as well, once the major seams are done.

By leaving things like buttonholes, buttons, or final zippers for last, you ensure the garment is nearly complete and properly shaped, making it easier to place those closures correctly.

Throughout the assembly, keep referring to your pattern guide. It’s normal if the first time through a set of instructions feels confusing – you’re learning a lot of new terminology and construction techniques. But as you finish one project and start another, you’ll notice many patterns repeat the same kinds of steps.

The more you sew, the more you’ll internalize the sequence. Garment construction is really about understanding how a 2D pattern transforms into a 3D item on the body.

With practice, you’ll start visualizing these steps and even anticipating the next move.

For now, take it one seam at a time, and don’t hesitate to ask more experienced sewists or look up tutorials if you get stuck on a particular assembly step.

Every sewist, no matter how seasoned, was a beginner once and had to figure out how sleeves or zippers worked!

Finishing Touches That Matter

gray metal tool on white textile

After all the major sewing is done, you’ll want to give your garment those finishing touches that make it truly wearable and polished.

Finishing touches are the small details added or completed at the end of a project – and they matter a lot! This is where you take your creation from “it’s basically together” to “wow, I can proudly wear this.”

Let’s go over a few key finishing steps:

Closures and Fastenings

Most garments need some way to put them on or take them off – for example, buttons, buttonholes, zippers, snaps, or hooks.

Attaching these properly is crucial for both function and look.

Sewing on buttons is typically done by hand with a needle and thread (often one of the first hand sewing skills you mastered). Take your time to sew buttons securely so they won’t pop off – use multiple passes of strong thread through the holes and consider a small extra knot of thread (called a shank) under the button if the fabric is thick.

If your garment has buttonholes, you might have sewn those using a machine’s buttonhole function or by hand with a blanket stitch. Make sure to carefully cut open the buttonhole (a seam ripper works well – just go slowly to avoid cutting beyond the bar tacks).

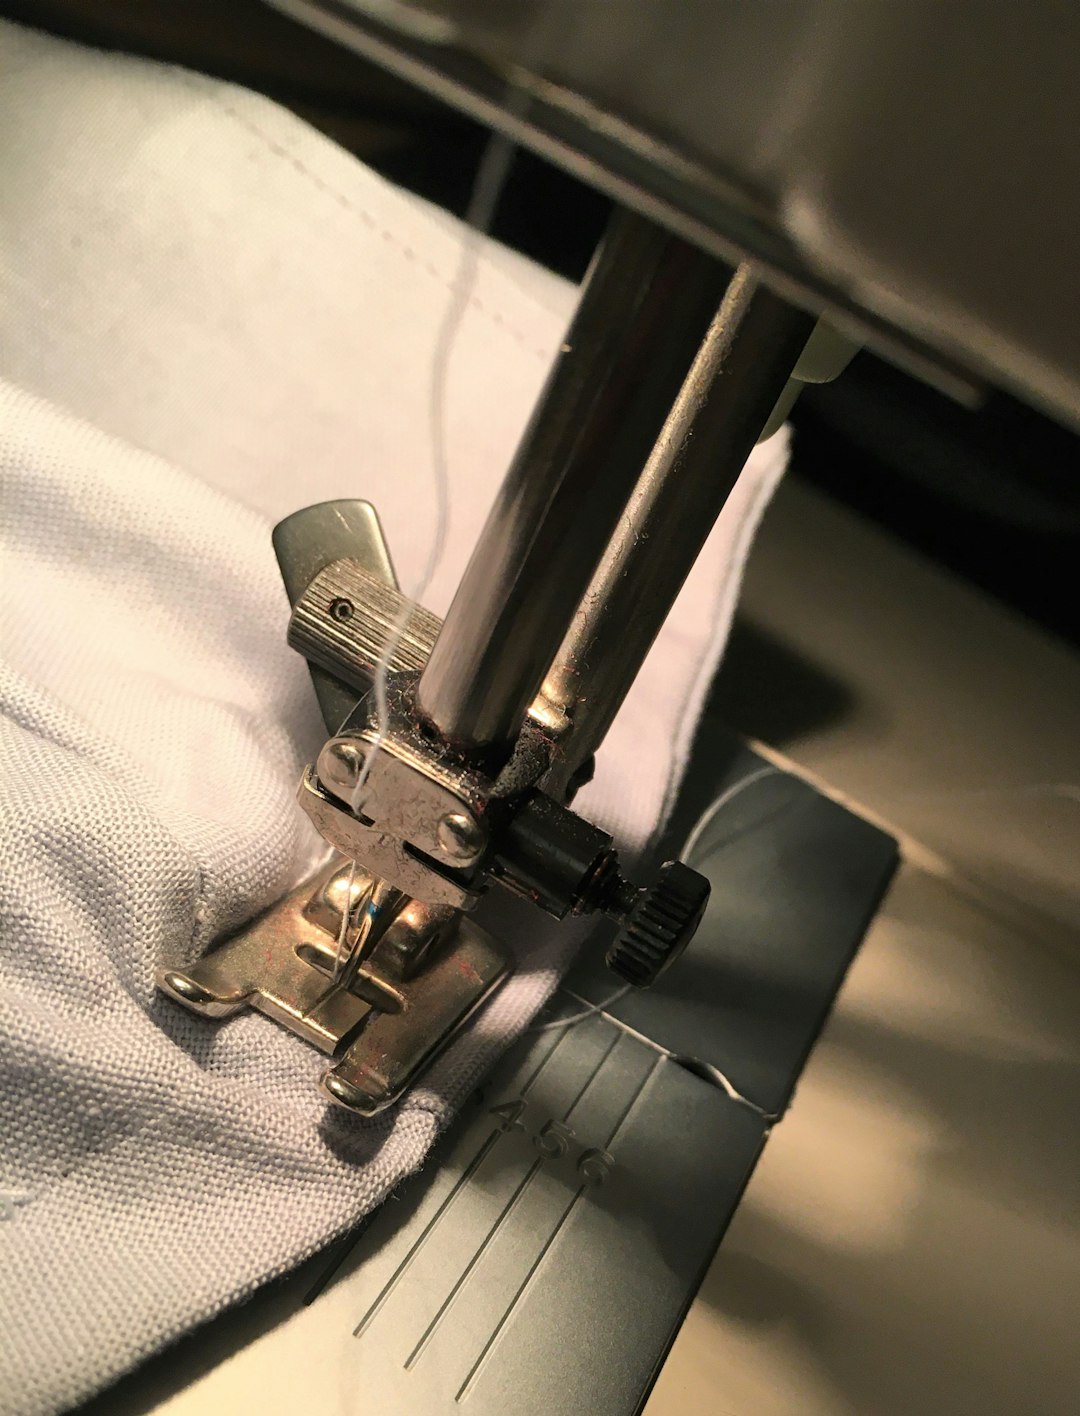
For zippers, if you didn’t attach them earlier, now is the time. Zippers can be machine-sewn with a special zipper foot; just be sure they are aligned straight and the stitching is close enough to the zipper teeth so it looks neat.

Whether it’s a dress zipper or shirt buttons, these closures usually come at the end of the project.

Pay attention here – a wonky buttonhole or misaligned zipper can detract from an otherwise great sewing job. But don’t stress: with careful marking and sewing, you’ll do fine. And remember, even experienced sewists sometimes redo a buttonhole or zipper to get it just right.

Hemming

The hem is the finished edge at the bottom of a garment (like the bottom of a skirt, pant leg, or sleeve cuff).

Hemming is an important finishing touch because it prevents the fabric from fraying and gives a clean edge.

There are different ways to hem depending on the garment and fabric.

A simple way is a double-fold hem: fold the raw edge up once, then fold it up again and stitch along the fold to encase the raw edge. Many beginners do this by machine with a straight stitch (just make sure to sew evenly so your stitching line looks straight from the outside).

For some garments, especially those made of very fine fabric or where you want an invisible finish (like a formal dress or dress pants), you might do the hem by hand using a blind stitch. This takes more time but results in a nearly invisible hem from the outside.

Whichever method, make sure the hem depth is even all the way around.

As a tip, when you’re sewing work wear or formal wear, a slightly deeper hem (like 1-2 inches) can give a more professional look than a tiny hem.

Press the hem after sewing for a crisp finish.

Final Seam Finishing and Trimming

At this stage, you should double-check all your seams inside the garment.

Did you remember to finish the raw edges on the inside (with zigzag or other methods) so they won’t unravel? If not, now is a good time to do that.

Clip any remaining excess threads hanging on the inside – a tidy inside is part of a well-finished garment (you’ll thank yourself later when threads aren’t snagging every time you wear or wash it).

If a seam allowance is bulky, you can trim it down a bit. For instance, necklines or armhole seams often benefit from trimming and clipping into the seam allowance so that curves lay flat.

These little clean-up tasks might seem minor, but they contribute to the garment’s comfort and longevity.

Pressing and Final Touches

We’ve said it before, but it bears repeating: press, press, press!

Give the entire garment a good press at the end. Iron the seams, the hems, the collar or any details so that everything lies nicely.

Pressing makes a homemade garment look store-bought by removing any puckers or wrinkles from the sewing process. It’s that magic touch that makes your sewing look professional. Many experts will tell you that “pressing is half of sewing,” and it’s true – a well-pressed garment just looks exponentially better.

In addition to pressing, any decorative finishing touches can be done now. This could be adding a bow, a decorative topstitch line along a seam (topstitching can both reinforce a seam and add a nice detail), or sewing on trims or embellishments.

These extras are optional and project-dependent, but if you want to personalize your creation, go for it! Just make sure any additions are securely sewn on and complement the overall piece.


By attending to these finishing touches, you ensure your garment is not only stylish but also durable.

It’s a great feeling to flip a piece of clothing inside out and see neat seams, or a perfectly sewn button.

Take pride in these details – you’ve earned it through careful work.

Finishing touches are where you really see the transformation from fabric to fashion.

Give yourself a pat on the back; you’re now ready to strut in your handmade creation!

Sewing for style: From Casual to Couture

You’ve learned the basics – now how do you apply these skills to different types of fashion?

One of the wonderful things about sewing is that once you have the fundamental techniques down, you can make all kinds of garments, from simple everyday wear to elaborate special-occasion outfits.

In this section, let’s explore sewing for style across a range of fashion categories, from casual to couture.

No matter where your fashion interests lie, the process of creation is similar – it’s the fabrics and techniques that may vary.

Here’s how your sewing journey can evolve into various styles.

Casual Wear

This is the realm of everyday clothing – think comfy t-shirts, simple dresses, skirts, or casual pants.

Sewing casual wear is a great way to practice your skills because these garments often use easier fabrics like cotton or knit jersey that are friendly to beginners. For example, a basic cotton skirt or a pair of elastic-waist shorts is an excellent first clothing project.

You’ll still apply the same techniques (measuring, cutting, seaming, hemming), but the construction tends to be straightforward.

Casual patterns typically don’t require extreme precision fitting, and the styles are forgiving.

You can also be creative – choose fun printed fabrics or add little personal touches like a contrast pocket.

The focus with casual sewing is on creating clothes that are wearable day-to-day, so durability and comfort matter.

It’s also an opportunity to learn how to sew clothes that fit you – even a simple garment, when made to your measurements, can fit better than store-bought.

Starting with casual wear builds confidence, and you get practical pieces for your wardrobe as a bonus.

Bridal Wear

On the opposite end of the spectrum from a t-shirt is sewing a wedding dress or bridal gown.

Bridal wear sewing is an advanced undertaking, but it’s something many sewists aspire to once they have enough experience.

Wedding dresses and formal bridal attire often involve delicate, luxurious fabrics (like silk satin, lace, chiffon, and tulle) and techniques that require patience and precision. For instance, sewing a bridal gown might entail working with multiple layers, adding a lining, using interfacing for structure in a bodice, hand-sewing lace appliqués, and installing things like corset backs or lengthy invisible zippers.

t’s not uncommon for bridal sewing to involve a lot of hand stitching as well – truly “couture” level sewing.

If you’re a beginner, a full bridal gown might be a bit out of reach for now, but don’t be discouraged – the skills you’re learning now are exactly what you’ll build on for such projects.

Many seamstresses start by sewing simpler formal dresses and gradually work up to wedding wear.

The key differences with bridal sewing are the fabrics and level of detail: delicate bridal fabrics can be slippery or prone to fraying, so they demand careful handling, and embellishments like beadwork or lace layering require time.

The reward, however, is huge – creating a bridal gown, whether for yourself or someone else, is like creating a wearable piece of art.

If bridal wear is a goal of yours, keep practicing those precision skills. One day you’ll be ready, and you’ll find that everything from marking the fabric carefully to hand-finishing the hem is worth the effort for that dream dress.

Evening Wear

Sewing evening wear (like cocktail dresses, prom dresses, or gala gowns) is similar in some ways to bridal sewing – the outfits are formal, and the fabrics are often fancy – but you have more freedom in colour and style.

Evening wear sewing typically involves fabrics such as satin, silk, velvet, sequins, lace, or tulle – the kind of materials that scream “special occasion.” In fact, evening gowns are generally made from formal fabrics like silk, satin, sequins, lace, and tulle.

These fabrics each have their quirks: silk and satin can be slippery and show pin marks, sequined or beaded fabric can be tough to sew through (often you have to remove sequins from the seam allowances), and tulle is sheer and can be tricky to control.

Because of these challenges, evening wear projects are a bit more advanced. However, many patterns for formal dresses are actually pretty straightforward in construction – the drama comes from the fabric and silhouette more than dozens of seams.

If you’re venturing into evening wear, choose a pattern that’s rated intermediate once you’ve done a few simpler projects.

You’ll learn techniques like underlining (to give thin fabric more body), using stabilizers for necklines, or sewing linings. An evening dress might also introduce skills like gathering (for example, gathering fabric to create a full skirt) or working with bias-cut pieces for a flattering drape.

The key is to take it slow and practice on scraps of your special fabric first to get the settings right.

With dedication, you can absolutely create stunning evening attire. Imagine stepping into a party wearing a dress you made yourself – that’s a huge confidence boost!

Corporate Fashion (Work Wear)

Sewing your own corporate or office wear allows you to tailor professional garments to fit perfectly.

Corporate fashion sewing usually involves garments like blazers, dress pants, pencil skirts, and tailored dresses or shirts that you would wear to work or business events.

These pieces often require more structured sewing techniques.

For example, making a blazer or suit jacket involves working with thicker suiting fabrics, adding interfacings to give shape to collars and lapels, inserting a lining, and mastering precise details like welt pockets or buttonholes. It’s certainly a step up in complexity from casual wear.

A simpler starting point in corporate attire might be a pencil skirt or a classic dress. These still teach you important skills like sewing darts for shaping (common in office wear to achieve a tailored fit through the bust or waist) and installing invisible zippers neatly.

When sewing work wear, precision and finishing are extra important because you want the garments to have a polished, store-bought appearance suitable for a professional setting.

Pay attention to things like topstitching (which can add a crisp, finished look) and pressing seams sharply. The fabrics for corporate wear tend to be medium-weight and stable (think wool blends, cotton sateen, or polyester blends that are not too flimsy), which can actually be easier to sew than slippery silks – the challenge lies more in the construction techniques and achieving a good fit.

As you advance, you might try making a suit set or a button-up shirt. These projects will solidify your skills in garment construction and teach you some tailoring tricks.

The end result is a custom wardrobe that fits you perfectly and looks entirely professional. Imagine wearing a blazer at the office and when someone compliments it, you proudly say, “Thanks, I made it!”


In all these categories – casual, bridal, evening, and corporate – the underlying sewing techniques are the same, only applied in different ways.

The journey from sewing a simple cotton top to sewing a silk evening gown is just a matter of building skills step by step.

You might start with a straightforward project (like a beginner-friendly skirt) and later find yourself doing bridal wear sewing with lace and layers, or crafting a chic suit for work.

Each project, whether simple or complex, teaches you something new and builds on what you already know.

The most empowering thing is realizing that with practice, there’s almost no limit to what you can sew.

You can follow your fashion inspiration and create pieces that fit your body and style, whether it’s a quirky print sundress for weekend wear or an elegant gown for a special event.

Sewing opens up a whole world of creativity – you’re not stuck with what’s available in stores. Want a vintage-style evening dress in a specific color? You can make it. Need a pair of trousers that actually fit your waist and hips? You can tailor your own.

As you progress, you may also explore the realm of couture techniques (the methods used in high-end, made-to-measure fashion).

Couture sewing often involves a lot of handwork, such as hand-picked zippers, intricate hand embroidery, or fine hand finishing of linings. While that’s a level beyond beginner, it’s something to aspire to if you love the craft.

Even at the beginner stage, it’s inspiring to know such techniques exist – you might incorporate a bit of hand couture detail in a project just for fun.

In summary, sewing for style means using your foundational skills to create garments for any occasion.

Start with what excites you and suits your current skill level, and then keep challenging yourself with new projects. Whether you’re sewing a cozy pair of pajama pants or a show-stopping evening gown, the process is empowering. You’re turning fabric and thread into something uniquely yours – and that’s the essence of fashion sewing.

Conclusion

Congratulations on making it through this beginner’s guide to sewing clothing!

By now, you’ve learned about hand sewing, been introduced to the sewing machine, and explored essential techniques like seams, pressing, and finishing.

You also have a basic roadmap for how garments come together and ideas for sewing projects ranging from casual to couture.

That’s a lot of ground covered – and it’s just the beginning of your sewing journey.

Learning to sew your own clothes is a bit like learning a new language: at first the “grammar” (rules and techniques) may seem overwhelming, but with practice, it starts to flow naturally.

Remember, every expert sewer started as a beginner. They made crooked stitches, sewed sleeves on inside-out, or had wonky hems at some point – but they kept going. The same will be true for you. Don’t be discouraged by mistakes; each one is an opportunity to learn (and we’ve all become good friends with our seam rippers, taking out stitches to try again!).

Celebrate each milestone: your first successful seam, your first completed garment, your first time wearing something you made in public – these are huge accomplishments.

As next steps, consider trying a simple sewing project to apply what you’ve learned. Perhaps download a beginner-friendly sewing pattern (many pattern companies label easy patterns as “Learn to Sew” or “Beginner”). Something like a basic skirt, a simple top, or pull-on pants is perfect for a first garment.

Set up your sewing space with your machine and tools, put on some music or a podcast, and enjoy the process. Use this article as a reference if you need a refresher on a technique. And don’t hesitate to seek out additional resources: there are countless tutorials, videos, and sewing communities online eager to help newcomers.

Sewing is a lifelong learning experience – even those who have sewn for decades still discover new tips and tricks – and that’s part of the fun.

Most importantly, keep a positive and patient mindset. There will be moments of frustration (like a bobbin tangling or a seam not matching up), but there will be even more moments of pride and joy.

Few things compare to the satisfaction of saying “I made this” when someone compliments your outfit, or the confidence boost you get from wearing a garment tailored by and for yourself.

Sewing is empowering – it gives you the ability to create, to solve problems, and to express yourself through fashion.

We hope this guide has made the world of sewing clothes a little less daunting and a lot more exciting for you. With practice, you’ll continue to build your skills and soon you’ll be tackling projects you once thought were impossible.

So grab some fabric, thread your machine (or needle), and start stitching.

Happy sewing, and welcome to the wonderful world of making your own fashion! Every stitch you sew is one step further into an amazing new hobby and skill set. Now, go forth and sew your style – you’ve got this!

Read More
21 - Sewing as a Business

Specialise to Thrive: How Choosing a Niche Can Make or Break Your Australian Sewing Business

Focused Skills, Strong Brands - A Guide to Niche vs General Sewing Services in Australia (Bridal, Alterations, Children's Wear & More

Aspiring sewing entrepreneurs in Australia - discover why focusing on a niche (bridal gowns, alterations, children's wear, etc.) can boost your business. Learn the advantages of specialisation vs general sewing, niche start-up costs (haberdashery, fabrics, machines), local supplier tips, pricing in AUD, and branding strategies to help your sewing business thrive.

Table of Contents

The Power of Specialisation in Sewing

Turning your passion for sewing into a profitable business is exciting - but success often hinges on finding the right niche.

In Australia's vibrant DIY fashion scene, a specialised focus can truly make or break a sewing business. Why? Because in a competitive market, being a Jack-of-all-trades might spread you too thin, whereas being a go-to expert in one area can attract loyal customers who seek out your specific skills.

Whether you dream of sewing bespoke bridal gowns or hemming jeans in a busy alterations shop, choosing a niche helps define your brand and target market from the start.

Focusing on a particular sewing niche - be it bridal sewing, clothing alterations, children's wear, or any other specialty - allows you to hone your skills, invest in the right equipment , and market more effectively to your ideal clients. By contrast, offering general sewing services can make it harder to stand out.

Many successful Australian sewing entrepreneurs have found that niche specialisation gave them a competitive advantage and a clearer path to growth. 

In fact, financial experts often advise creative businesses to narrow their focus early on; as one industry CPA noted, it's usually "Better to specialise until you get to about that half a million in annual sales" before broadening out.

In this article, we’ll explore the advantages of specialising vs. remaining a generalist, delve into specific niche options (from bridal and evening wear to repairs and alterations, casual/corporate/resort wear, and children’s wear), and outline what you need to start each one – including startup costs for machines, tools, fabrics and haberdashery.

We’ll also discuss sourcing materials from local Australian suppliers, potential challenges of each niche (and how to overcome them), as well as tips on realistic pricing, managing client expectations, and crafting a strong brand for your sewing business.

Let’s get started on finding the focused path that could set your sewing venture up for lasting success!

Why a Niche Beats Being a Generalist in the Sewing Business

Before diving into individual specialisations, let’s look at why choosing a niche is often smarter than offering general sewing services

Build Expertise and Reputation

Focusing on a niche allows you to become highly skilled in that area. You’ll finish more projects of a similar type, improving speed and quality.

Over time, you develop a reputation as the expert in that service – whether it’s the “bridal dressmaker who does flawless couture gowns” or the “alterations wizard for perfectly tailored suits.”

This expertise makes clients trust you more and refer others specifically seeking that service.

Less Competition, Clear Differentiation

In Australia, there are many general sewing and alteration services, so standing out can be tough.

A niche sets you apart. For example, instead of being one of dozens of generic sewing businesses, you could be the only one in your area specialising in custom dance costumes or eco-friendly children’s clothes.

Your marketing can highlight what makes you unique. Customers with that specific need will think of you first.

Premium Pricing Potential

Specialists can often charge higher rates because of their expertise and the tailored value they offer.

Clients are usually willing to pay more for someone who is known for delivering the exact service they need at a high quality level.

A general sewist might struggle to justify premium prices, but a bridal specialist or a bespoke tailor can command a higher fee for their depth of skill and niche experience. (For instance, brides routinely spend around $2,500 on a wedding dress in Australia, and custom gowns often range from $3,500 to $7,000 or more – figures that reflect the specialized work involved.)

Targeted Marketing & Branding

With a clear niche, every aspect of your branding and marketing becomes easier to tailor. You can identify your target market and reach them more directly.

For example, if you specialise in bridal sewing, you can network with wedding planners and bridal boutiques, use hashtags like #bridaldesigner, and showcase wedding dresses in your portfolio.

Compare that to a generalist who has to appeal to anyone and everyone needing any sewing work – their message ends up less focused. By honing in on a niche, you know exactly who your ideal customer is and can design your services, website, and social media content to speak directly to that audience.

Streamlined Operations

Specialising can also mean a more efficient workflow and inventory.
 
You can invest in the specific tools and supplies you’ll use most, rather than a little of everything.
 
Your work process becomes smoother with repetition and specialised equipment.

Additionally, you may deal with fewer types of materials – for instance, a swimwear maker mostly handles spandex and linings, whereas a generalist might need everything from denim to chiffon on hand.

Focusing narrows your material needs, potentially reducing costs and storage requirements.


Of course, being a specialist isn’t without drawbacks – you are focusing on a smaller segment of the market, and you’ll need enough demand in that niche to sustain your business.

However, you can mitigate this by choosing a niche that has a proven market (we’ll discuss Australian market context for each niche below) and by excelling in customer service so you retain and attract clients.

You can also start with one niche and expand later; many entrepreneurs find that mastering one area first is the key to building a solid foundation – once you’re established, you might add complementary services.

But initially, as one business mentor put it, “trying to do it all at once... may overwhelm” a new business.

Starting focused helps you learn your customers’ needs deeply and fine-tune your business model before broadening out.


Now, let’s explore some specific areas of specialisation common in the sewing industry, and see how each niche looks in terms of opportunities, startup requirements, and challenges in an Australian context.

Niche Options for Sewing Businesses in Australia

There are many directions you can take your sewing business. Here we’ll cover some popular specialisation areas and what to consider for each.

Repairs and Alterations Specialist

What it involves:

A repairs and alterations business focuses on modifying, mending, and tailoring existing garments.

Services can range from hemming pants, taking in or letting out seams, replacing zippers, patching holes, to refitting vintage clothing.

In Australia, there’s steady demand for quality clothing alteration services – people often need school uniforms adjusted, formal wear altered, or everyday clothes repaired rather than replaced.

This niche can provide a consistent income stream, since virtually everyone has something in their wardrobe that could fit better or needs fixing.

Advantages:

Alterations and repairs are a bread-and-butter niche – often considered recession-proof – because even when people aren’t buying new clothes, they still need their current clothes adjusted or mended.

You’ll likely get repeat customers (e.g. someone who trusts you with all their work suits or a family that brings you every torn school skirt).

Turnaround times are usually shorter than for custom sewing projects, so you can complete more jobs in a week.

Also, startup costs can be relatively low compared to other niches, since you’re working with existing garments (no need to buy lots of fabric upfront).

It’s a great way to utilise your sewing skills daily without the complex design work of creating from scratch.

Startup Costs & Essentials:

To start an alterations business, invest in a durable, multi-functional sewing machine that can handle a variety of fabrics – from delicate silks to heavy denim.

A good quality domestic machine might cost anywhere from $500 to $1,500 AUD for a heavy-duty model, or you might even consider an industrial straight-stitch machine (these sew fast and handle thick materials well, often priced around $2,000-$3,000+ new).

An overlocker (serger) is highly recommended for finishing seams neatly, especially on knits; basic overlockers start around $300 and go up to $1,000+.

You’ll also need a well-stocked haberdashery kit: an array of thread colours (so you can match any garment you’re working on), assorted sizes of needles (for machine and hand sewing, to tackle everything from denim to chiffon), scissors and snips, a seam ripper (your best friend for altering seams), measuring tapes, tailors’ chalk/markers, straight pins, and replacement notions (like zippers, buttons, hooks & eyes).

Stocking a variety of common zipper lengths and colours, basic buttons, and elastic will save you trips to the store mid-project – budget perhaps a few hundred dollars to build up this supply.

An ironing station is a must for professional results (pressing seams, hems, etc.), so get a reliable iron (or even a small steam press) and a sturdy ironing board (together around $150-$300).

Optionally, a blind hemmer machine or blind hem foot can be useful for trousers and skirts hems, though not mandatory at startup.

Consider a dress form if you’ll be doing a lot of dress or suit alterations – an adjustable dressmaker’s mannequin (approximately $200-$400) helps with pinning and checking fit.

Supplier considerations:

For an alterations niche, you’ll mainly need notions and thread. These are easily sourced from large Australian fabric stores like Spotlight or Lincraft, which carry a wide range of Gütermann threads, YKK zippers, buttons, interfacings and more. You can buy in bulk online or in-store.

Having a relationship with your local Spotlight might be handy – they often have sales on thread and notions where you can stock up.

For specialized needs (e.g. a unique button or a heavy-duty jeans zipper), you might turn to smaller suppliers or online shops like The Remnant Warehouse (Sydney-based, also online) or other local haberdashery specialists.

Because alterations don’t typically require lots of fabric yardage, you can even use fabric scraps or offcuts for patches and pocket repairs; consider reaching out to local tailoring shops or designers to see if you can take some offcuts off their hands.

Supporting small Aussie suppliers for fabrics/notions can give you quality and a point of difference – as one expert noted, “finding a supplier keen to work with you and see your business grow is important”.

Pricing & client expectations:

Clients seeking alterations often expect quick service and reasonable prices – many view alterations as a small expense (compared to say, buying a new garment).

It’s important to price your time realistically. For example, hemming a pair of pants might be priced around $20-$30 AUD, taking in a dress could be $50-$100+, and bridal gown alterations could run a few hundred dollars depending on complexity.

Research what local alteration shops charge to set a baseline.

Be ready to explain your pricing if needed by highlighting the skill and time involved (“This isn’t just a quick stitch – I’ll be reworking the lining and invisible zip, which takes careful work”).

Setting clear expectations is key; let clients know typical turnaround times (e.g. 3-7 days for standard alterations, longer during peak seasons like before school formals or holidays).

Branding for an alterations business can emphasize reliability, convenience, and expertise. For example, you might choose a business name like “Quick Stitch Alterations” or “Perth Perfect Fit” to instantly convey your service.

If you operate from a home studio, make sure you provide a professional experience – a clean fitting area, good communication – so clients see you as on par with a retail shop.

Word-of-mouth is powerful in this niche, so every happy customer can bring in five more.

In Perth, one young entrepreneur started an alterations shop at age 24 and built a loyal following over the years by offering modern styling advice and personable service. Her business, still thriving 30 years on, shows that a specialty in alterations can indeed be a long-term success with the right approach.

Challenges & tips:

The alterations niche can be physically demanding – lots of hours hunched over a machine or fitting clients. Invest in an ergonomic chair and take breaks to stretch.

During busy periods (e.g. before school balls, weddings, Christmas), you might be flooded with requests; manage this by scheduling wisely or even hiring part-time help if needed (perhaps a fashion student looking for experience).

Another challenge is dealing with customers’ emotional attachment to their clothes – you’ll encounter bridal gowns that cannot be messed up, or clients anxious about cutting into expensive suits.

Honing your communication skills will help reassure clients and clarify what’s possible.

Occasionally, you may have to turn down a job if it’s beyond your comfort zone (for instance, major resizing that is practically a remake) – better to say no than to have an unhappy customer.

Finally, keep learning tailoring techniques; the more alterations tricks you know (like easing in a sleeve or altering a garment’s shoulder), the more kinds of jobs you can confidently tackle.

Bridal and Evening Wear Specialist

What it involves:

Specialising in bridal and evening wear means you’ll be designing and/or sewing glamorous outfits for life’s big events – think wedding gowns, bridesmaid dresses, mother-of-the-bride outfits, school formal (prom) dresses, gala evening gowns, and perhaps fancy cocktail dresses.

This niche is all about custom, couture-quality sewing with luxurious fabrics and elaborate designs.

Clients are often brides or individuals looking for one-of-a-kind attire that fits them perfectly and reflects their style.

The work in this area can range from creating a completely custom wedding dress from sketch to final fitting, to doing significant alterations on store-bought bridal gowns (some bridal specialists offer both custom creation and alterations services).

It can also include making bridal accessories (veils, fabric belts, etc.) or evening wraps to complement gowns.

Advantages:

Bridal/evening wear is a high-value niche. Each project typically commands a high price, because of the complexity and importance of the garment.

Australian brides are prepared to invest in their dream dress – the average spend on a wedding dress is about $2,500 (including off-the-rack and custom), and many custom-made wedding dresses fall in the $3,500–$7,000 range for mid-level designers, with luxury bespoke gowns reaching $10k and beyond.

This means if you establish yourself in this niche, you can potentially earn more per project than with everyday clothing.

Moreover, it’s creatively fulfilling for those who love intricate sewing and design work – you get to work with gorgeous fabrics like silks, laces, and beaded tulles, and really push your sewing skills to couture levels.

A big plus: referrals are common in this niche. Do a great job on one bride’s gown, and you may get calls from her engaged friends or from guests who admired your work.

Over time, you can build a strong reputation via word-of-mouth among bridal circles or event communities.

There’s also a clear emotional reward – you’re helping make someone’s special day outfit perfect, which can be very gratifying (happy tears at a final fitting are not uncommon!).

Startup Costs & Essentials:

The bridal and formal niche likely requires the highest startup investment in equipment and materials, but it can be scaled depending on whether you start with alterations or full custom creations.

At minimum, you need an excellent quality sewing machine that handles delicate fabrics with precision. Look for features like adjustable presser foot pressure (for chiffons vs. thick layers), a variety of stitches (especially zigzag and buttonhole), and reliability for long seams.

A good computerized domestic machine from a brand like Janome, Brother, or Bernina in the $1,000-$2,000 range can suffice for starting out.

Some bridal sewists eventually invest in an industrial walking-foot machine or a high-end straight stitch for perfectly even seams on slippery fabrics, but you can add that once you have steady orders.

An overlocker is crucial for finishing raw edges of silks and linings neatly; expect ~$500-$800 for a mid-range model that handles fine materials well (some prefer 3-thread narrow overlock for minimal bulk on bridal fabrics).

You might also invest in a coverstitch machine if you plan to sew a lot of stretch evening gowns (to hem knits cleanly), though this might be optional at first.

In terms of tools: 

Fine hand-sewing needles, beading needles, and a variety of thread types (silk thread for hand-appliqué, cotton-covered polyester for machine stitching, etc.) will be in constant use.

You’ll need specialty presser feet (a Teflon foot for slippery satin, a beading foot if attaching strings of beads or pearls, a rolled hem foot for chiffon hems, etc.).

Good lighting is essential for working on white/ivory fabrics – invest in a bright task lamp.

A large cutting table is very helpful (bridal gowns are huge!), but if you don’t have space, at least have a cutting mat you can lay on the floor or a temporary table.

Expect to spend a fair bit on initial fabric and trim inventory: while many custom dressmakers order fabrics per project (often involving the client in choosing and purchasing), it’s wise to have sample books or swatches of common materials (silk satins, chiffons, laces) which you can get from fabric suppliers.

You may also keep a small stock of practice or lining fabrics to mock-up dresses (muslin/calico for test gowns, lining materials).

Don’t forget interfacing, boning, and other structural materials – for bridal wear, you’ll likely use sew-in interfacing for bodices, spiral steel or plastic boning for corset style tops, bra cups, horsehair braid for hemming tulle layers, etc. These specialty items can add up, so maybe allocate a few hundred dollars for an initial supply.

And of course, decorative trims: lace appliqués, beads, crystals, buttons or clasps for bridal gowns, special zippers (some wedding dresses use sturdy zips or delicate loops for corset backs).  You might buy these per project, but having some beautiful appliqué lace pieces or rhinestone trims on hand can inspire designs. 

An industrial steam iron or a decent garment steamer is highly recommended – bridal fabrics often crease and must be pressed carefully; a steamer (~$200) helps with final touch-ups on a hanging gown.

Supplier considerations:

Sourcing fabrics and trims is a critical part of a bridal/evening niche.

Australian businesses can tap into both local and international suppliers.

The upside of local sourcing is faster delivery and the ability to see materials in person.

Major cities have specialty fabric stores: for example, Sydney’s bridal fabric shops (in the CBD or suburbs like Surrey Hills) offer silks and French laces; Melbourne has stores like d’Italia (Malvern) known for couture fabrics; Tessuti Fabrics (in Sydney, Melbourne and online) carries high-end silks, lace, and Italian textiles suitable for evening wear.

There’s also Bridal Fabrics Australia (an online supplier dedicated to wedding fabrics) and wholesalers that import fabrics.

You might form relationships with a supplier to get materials at a trade price.

Keep in mind, some luxury fabrics are expensive – fine imported lace or silk can cost $50–$100+ per meter.

You don’t necessarily need to stockpile these, but know where to get them when you need them.

Trims like Swarovski crystals or quality beads can be found through specialty bead shops or ordered online.

Another consideration is working with the client’s budget: some brides will provide their own fabric or have a particular source (for instance, buying silk in bulk from a known retailer).

Be flexible – as the expert, you can guide them to good sources or work with what they bring.

Don’t forget to factor fabric costs into your quotes clearly if you’re supplying them, so the client understands the material expense versus your labour.

Also, remember to get small notions locally – even an all-white wedding dress needs things like thread, hidden zippers, hooks, etc., which you can get from Spotlight or a local craft store if needed quickly.

Pricing & client expectations:

Clients in the bridal and evening sector come with high expectations (rightly so, given the importance of the occasion). They expect superb quality, attention to detail, and a personalized experience.

Pricing your work here must reflect the hours (often dozens if not 100+ hours for a custom wedding gown) and the skill required.

It’s common to charge a premium for bridal services – for example, alterations on a bridal gown might easily run $300-$600 AUD for extensive adjustments, and creation of a custom wedding dress could be anywhere from $1,500 (for a simple design with inexpensive fabric) to $5,000-$10,000+ for elaborate couture designs including expensive fabrics and hand detailing.

Research what bridal dressmakers in your region charge. Be prepared to justify your pricing by explaining the process: “This gown will involve multiple fittings, hand-beading lace appliqués, and constructing an internal corset for support – it’s a labour-intensive creation.”

Clients will appreciate the transparency and many will understand the “you get what you pay for” principle when it comes to once-in-a-lifetime attire.

Managing timelines:

Managing timelines is crucial – bridal clients often come to you many months in advance. 

You’ll need to schedule out design consultations, fittings (usually 3+ fittings for custom dresses), and final adjustments.

Clear communication is key: set milestone dates (e.g. muslin fit by X date, final fitting by Y date).

It’s wise to pad your timeline a bit to account for unexpected delays (fabric shipping delays, client’s body measurements changing, etc.).

Always get a deposit (especially for custom work) to cover materials and commit the client.

Branding & marketing:

This niche benefits hugely from a strong brand image. You’ll want a portfolio of your work – even if you’re new, consider making a sample gown or two (perhaps your own gown or a friend’s) to photograph on a model.

A professional-looking website or Instagram page with beautiful photos is your shopfront. Use SEO keywords on your site like “bridal sewing Australia”, “custom wedding dress Perth”, “bridal alterations [Your City]” to help local brides find you.

Align your brand aesthetic with your target market: for instance, if you aim for modern, minimalist bridal designs, let your logo, website design, and even the name reflect that vibe (clean, contemporary, maybe a sleek one-word business name).

If you’re all about princess gowns and traditional romance, go for a more elegant, flowy brand presentation.

In Australia, networking with the wedding industry helps – consider partnering with a local bridal boutique (some boutiques showcase local designers or refer custom requests they can’t fulfil), attending bridal fairs, or listing on bridal directories like Easy Weddings.

Word of mouth is golden: one delighted bride can send you three new clients.

Ensure each client feels special – small touches like a thank-you card, or a commemorative photo of them in the dress (with permission to share on your social media) can enhance the experience.

Also, emphasise any unique selling points: for example, if your gowns are Australian-made with locally sourced fabrics, highlight that – many customers love a sustainable, local angle.

Custom sewing can indeed be more sustainable than mass production, as one bridal blog notes: a custom dress is created thoughtfully with only needed materials, unlike mass-produced gowns which can create excess waste.

Such points can form part of your brand story.

Challenges & tips:

Working in bridal can be high-pressure. Clients may be emotionally charged (weddings are a big deal!), and “bridezilla” situations do happen.

Patience and professionalism are your best tools.

Always have a written agreement on the scope of work to avoid scope creep (e.g. bride changing the design drastically mid-way – have a policy on how that’s handled, likely with additional cost).

Another challenge is fitting – bridal wear often has very structured fits; if you’re not experienced in advanced dressmaking, consider taking courses in bridal couture or apprenticing with an established bridal tailor to gain skills.

Perfectionism is generally a good trait here, but watch out for analysis paralysis – know when the dress is “finished” and looking amazing, and avoid overworking it to death.

Also, seasonality: bridal inquiries may peak after the holiday engagement season and in the lead-up to spring/summer weddings.

There might be quieter months where you can focus on marketing or making sample dresses.

Financially, remember that while each project brings a big payment, the sporadic nature means budgeting is key – deposits help with cash flow.

Finally, cherish the positives: few things are as rewarding as seeing a client glow in a garment you crafted just for them. Those moments are what make this niche worth it.

Casual, Corporate, and Resort Wear Designer

What it involves:

This is a broader category encompassing everyday apparel or a fashion line.

You could choose a sub-niche within it – for example, casual wear (comfortable everyday clothing, streetwear, loungewear), corporate attire (office-wear like suits, blouses, tailored pants, uniforms), or resort wear (summery dresses, beach cover-ups, cruise wear).

Many Australian sewing entrepreneurs in this space essentially act as small-scale fashion designers or bespoke clothiers.

You might create a small clothing label featuring your original designs, or offer made-to-measure services for individual clients who want unique clothes beyond the standard sizes/styles in stores.

Resort wear is particularly relevant in Australia’s climate and culture – think of flowy linen pants, sundresses, or chic holiday outfits that appeal to those heading to our beautiful beaches or resorts.

Corporate wear could involve custom tailoring for professionals (e.g. women who want better-fitted work dresses, or men who need shirts that fit properly), or designing a line of mix-and-match office basics.

Casual wear might overlap with street fashion or even sustainable/ethical fashion if you go that route (using organic fabrics, etc.). This niche is somewhat the middle ground between high-end and everyday – you can infuse creativity and personal style into garments people will wear on a regular basis.

Advantages:

The freedom to express your design style is a big plus here.

Unlike bridal (which is event-specific) or alterations (working on existing clothes), creating casual/corporate/resort wear lets you set trends and build a brand style.

The Australian market appreciates independent fashion labels – there’s a growing appetite for local, ethically made clothing as an alternative to mass retail.

If you tap into a particular aesthetic that resonates (say, minimalist linen clothing for hot climates, or bold printed shirts for office wear with personality), you could develop a loyal following.

Another advantage is the potential for repeat customers and stable sales if you produce ready-to-wear items. For instance, if you sell online or at local markets, someone who loves your summer dress might come back next season for a new piece.

If you operate via custom orders, a satisfied client might order multiple garments or refer friends.

Compared to one-off event pieces, casual/corporate wear can have a more constant demand cycle.

Also, startup can be gradual: you might begin with a few designs and scale up production as orders come in (you can even sew each piece yourself to start, then outsource sewing if you get large orders).

In resort wear, especially, Australian designers often find a niche exporting or selling to tourists; a unique beachwear line could attract buyers from overseas markets too.

Startup Costs & Essentials:

Starting a clothing line or bespoke service means balancing design, production, and sales.

On the equipment side, a versatile sewing machine that can handle various garment types is key (much like the alterations setup). If you plan to sew light cottons, knits, and maybe the occasional suiting, ensure your machine has stretch stitch capability and can make automatic buttonholes for shirts or trousers. A price range of $700-$1500 AUD for a decent machine is reasonable.

An overlocker is almost mandatory if you’re making finished clothing to sell – consumers expect clean, durable seam finishes similar to store-bought clothes.

For knit garments or active/resort wear, a coverstitch machine will give you professional hem finishes (e.g. on t-shirts or swimwear), but you might manage with a twin-needle on your regular machine initially (twin-needle can simulate a coverstitch).

Another cost to consider is patternmaking. You’ll need patterns for each design – you can draft them yourself (pencil, pattern paper, French curves, etc. – minimal cost) but it’s time-intensive.

Some entrepreneurs start with commercial patterns as a base (ensuring you have rights if selling, or using indie patterns that allow small-scale selling) and then tweak them.

Others hire freelance pattern makers to create digital patterns/graded sizes if they plan to produce standardized sizes.

If you’re doing made-to-measure, you might create a custom pattern for each client – that’s more labour per garment, but yields a perfect fit.

Your initial material stock depends on your approach: For a clothing line, you’d source fabric in bulk (rolls of fabric) for consistency across your pieces. For bespoke one-offs, you might buy fabric per client or hold a selection of sample fabrics for them to choose from.

Either way, budgeting for fabric is critical. Fabrics vary widely in cost: good quality linen might be $20-30/meter, cotton jersey $15/meter, wool suiting $50/meter, etc.

If you’re making a batch of 10 dresses, and each needs 2m of fabric, that’s 20m of fabric – costs add up, so plan accordingly.

It’s wise not to over-invest in one fabric until you know it will sell or be used. You can start by purchasing smaller quantities to make samples and only buy larger amounts when you have orders.

Don’t forget notions: different types of garments need different haberdashery items. Shirts and dresses need buttons (button packs or bulk buys), zippers of various lengths (invisible zips for dresses, standard zips for skirts or pants), elastic for waistbands, interfacing for collars or facings, etc. Having a range of these on hand is helpful.

Also, consider branding elements like labels for your clothing line – you can order custom woven labels or care labels (for Australian compliance, any clothing sold should have care instructions labels and fibre content, see ACCC guidelines). The Care Labelling Australia standard means you must attach proper care labels to garments you sell, and for kids’ clothing, there are additional safety labelling requirements (like fire hazard labels on kids’ sleepwear). So factor in the cost of getting labels printed (the Dutch Label Shop and Wunderlabel are examples of companies where you can order these).

If focusing on corporate wear, you might need some tailoring tools: a tailor’s ham and sleeve roll for pressing curves, possibly a sleeve board, and good pressing equipment to give garments a crisp, professional finish. A quality iron and maybe a tailors’ clapper for sharp seams in suits will be important (wrinkled seams won’t impress a corporate client!).

Supplier considerations:

The range of materials in this niche is broad, so likely you’ll have multiple suppliers.

For casual and resort wear fabrics, Australia has some great options: Spotlight and Lincraft for basics (cottons, linens, knits), but also look into wholesalers or specialty stores for higher-end material or bulk buying.

For example, Nerida Hansen Fabrics (an Australian designer fabric supplier) offers trendy prints on cottons and knits and sells wholesale to small businesses.

Super Cheap Fabrics (despite the name, a reputable Melbourne-based store with online sales) has affordable fabric options and often bulk deals.

If sustainability is your angle, consider suppliers of organic fabrics or deadstock materials (deadstock = surplus fabric from mills, which is eco-friendly to use) – there are Aussie vendors specializing in that too.

For corporate fabrics (wools, suitings, shirting cottons), you might reach out to wholesalers like Wall Fabrics or check if any local textile mills supply tailors.

Buttons and trims for shirts or suits can be sourced from haberdashery wholesalers (some in Australia or you may import if needed).

The key is reliability and consistency: if you plan a range of products, ensure your supplier can provide the same fabric or trim again if your product takes off. It’s also smart to have backup suppliers for critical items.

One interesting resource: if you aim to produce more than you can sew yourself, Australia has small manufacturing units. But since we’re focusing on starting small, you might be sewing all items initially. However, be aware that as you grow, you could outsource production while you focus on design and business management.

Pricing & client expectations:

Pricing in this niche depends on your model. If you’re selling finished pieces (like at markets or online), you’ll need to calculate a price that covers your materials and time and has a profit margin. This can be tricky because handmade clothing often ends up with a higher price than mass retail.

Don’t undervalue your work – know your numbers (materials + labour + overheads) and set a fair price. As one Australian sewing business guide points out, “Don’t undervalue your skills... If people are not willing to pay your worth, then they are not your target audience and should be shopping at a cheap mass production shop”. In other words, you’re not competing with Kmart or Zara on price – you’re offering something different (custom fit, unique design, ethical production, etc.) that justifies a higher price. Still, you must align with your target market: figure out what they’d reasonably pay for a custom shirt or a handmade dress.

For bespoke corporate wear, clients might compare your prices to a high-end off-the-rack plus alteration cost, or to a tailor. For example, a custom women’s blazer might be priced a few hundred dollars (fabric plus tailoring), which could be comparable to buying a designer blazer. Be transparent that they’re getting a garment made just for them.

If you specialize in, say, plus-size corporate clothing, you’re solving a problem (limited options in stores), which clients may happily pay for, for clothes that fit perfectly.

Client expectations will vary: a casualwear customer buying at a market might just care that the item is cool and well-made; a bespoke client will expect personal service, fitting sessions, and choice of fabrics.

Outline your process clearly for custom orders (consultation, fittings, how long it takes).

For ready-made clothing line customers, provide accurate sizing charts and good customer service regarding queries or returns.

Branding & marketing:

With a fashion-oriented niche, branding is everything. You are effectively creating a fashion brand, even if it’s just you sewing at home.

Choose a brand name that reflects your style or niche (e.g. “Coastal Linen Co.” for resort wear, or “Sharp Stitch Suites” for corporate attire – be creative!).

Develop a logo, even a simple text logo, to put on your labels and website.

Use social media to show off your designs – Instagram and Pinterest are great for fashion.

High-quality photos of your pieces being worn (perhaps get friends to model, or collaborate with a local photographer or influencer) will go a long way.

Also consider Australian context in marketing: Australians tend to appreciate practicality and comfort in clothing, so if your niche is resort wear, highlight features like breathable fabrics for our hot summers, or sun-smart design (e.g. long sleeves but light material). For corporate, maybe stress quality and fit in a way that resonates with the professional lifestyle here.

If you’re selling online, ensure your site or Etsy shop is SEO-optimised with keywords like “Australian made clothing”, “handmade dress Australia”, “linen resort wear Australia”, etc., as those can attract customers looking for local products.

Participating in local artisan markets or pop-up shops (like Finders Keepers market or local weekend markets) can also help you gain exposure and get direct feedback from customers.

Building a brand takes time, but consistency is key: consistently great products, visual identity, and customer service will slowly but surely build recognition.

Challenges & tips:

One challenge in this niche is scalability and workload.

Sewing whole collections or multiple orders by yourself is time-consuming. It’s easy to burn out if you get a surge of orders (a great problem to have, but a challenge nonetheless!).

Plan how you might handle growth – could you hire a contract seamstress for piecework or invest in faster equipment?

Also, fashion trends change; keep an eye on what styles or fabrics are popular, but also stay true to your niche.

If you advertised yourself as using only natural fibres, for instance, maintain that brand promise.

Customer feedback can be gold – listen to what sells and what people ask for. Maybe your beachwear line gets lots of requests for longer hemlines or different sizes – use that info to adapt.

Another challenge: regulations – as mentioned, ensure you comply with labelling laws (fibre content, care, origin, etc.). If you make children’s wear in this category, there are safety standards (no long cords that can snag, flame-retardant treatment or warning labels on kids’ sleepwear, etc. It’s not too onerous, just something to research and implement.

Lastly, know that this niche can be saturated at the low end (cheap imports), so you must emphasize what makes yours worth it – be it quality, local craft, custom fit, limited editions, or eco-friendly aspects.

Many consumers are willing to support a local designer if they connect with your story and see value in your product.

Children's Wear Specialist

What it involves:

If you adore making tiny clothes and playful designs, children’s wear might be your calling.

This niche covers clothing for babies, toddlers, and kids (and could extend to early teens).

You might specialize further within it, such as handmade baby clothes and accessories (onesies, bibs, rompers), toddler and kids’ fashion (cute dresses, shorts, tops, special occasion outfits for kids), or even school wear and uniforms.

Some sewing entrepreneurs also find a niche in children’s formal wear (like little suits or flower girl dresses) or costume wear (for dance schools or cosplay for kids).

Another angle is focusing on organic and safe materials for children’s clothing, which appeals to parents.

The children’s wear market in Australia is quite robust – parents are always needing new clothes as kids grow, and many love the idea of unique or handmade items that you can’t get in big retail stores.

Advantages:

Kids’ clothes are typically small, meaning they use less fabric and can be quicker to sew than adult garments. This can sometimes mean lower material costs and the ability to produce items more rapidly.

There’s also an emotional pull in this market – parents and gift-givers often seek out special items (like a first birthday dress made by a local maker, or a quirky printed shirt that stands out).

Niche children’s brands have become popular, especially those that offer sustainable fabrics or cater to specific needs (e.g. sensory-friendly clothing for kids with sensitivities, or adaptive clothing for children with disabilities – a possible niche to consider).

If you hit on a design that people love (say, harem pants for toddlers in fun Australian animal prints), you might find you have repeat buyers every time their child goes up a size.

Also, the gifting market is big – many customers might be grandparents or friends buying your children’s items as gifts. This niche allows a lot of creative fun with prints, appliqués, and styles – you can really let your imagination run wild with colours and themes that would be harder to sell to adults!

The Australian context is favourable too: there’s a cultural trend towards supporting local makers for baby gifts and kids’ items, and parents love the idea of “Australian-made” for their little ones.

Startup Costs & Essentials:

Much of the equipment needed for children’s wear is similar to the casual wear setup.

A reliable sewing machine (which can do sturdy stitching for seams that will get lots of wear-and-tear, as well as delicate work for tiny baby garments) is essential.

An overlocker is highly useful for sewing knit fabrics (many kids’ clothes like t-shirts, leggings, onesies are in knit jersey or interlock), and for finishing seams to withstand frequent washing.

Safety is paramount in kids’ items, so make sure any snaps, buttons, or trims are very securely attached (a snap press tool, which can cost around $150, can be a great investment if you plan to use a lot of press-studs for baby clothes).

Elastic insertion will be common (waistbands, cuffs), so tools like elastic guides or bodkins and lots of quality elastic in different widths should be in your kit.

Fabric-wise, you might lean towards natural fibres (cotton, bamboo, merino) for comfort. These can range in price; for example, organic cotton jersey might be $20-$30 per meter.

Since each kids’ garment uses less fabric, you can sometimes use remnants of larger projects – however, if you plan to make multiples, you’ll still need to purchase sufficient yardage.

Keep in mind prints and colours – kids’ markets often love vibrant prints. There are Australian designers who create beautiful kid-friendly prints (e.g., fabrics featuring native animals, rainbows, etc., available via fabric printers or wholesale).

You may also consider fabric certifications (like GOTS organic) if you want to market that angle.

For trims: avoid anything that isn’t child-safe. This means no long cords or ties on baby clothes (drawstrings on kids’ hoodies, for example, have regulations).

Use non-toxic, sturdy materials. For instance, if sewing baby toys or accessories, you’d use safety eyes or embroidered features rather than buttons that could be a choking hazard.

If making sleepwear, be aware of the Australian fire safety label requirements – any kids’ sleep garment (like PJs or nightgowns) must have a fire hazard label indicating the level of flammability risk (either low fire danger or high fire danger). This might mean using flame-retardant fabric for certain items or simply attaching the mandatory label (available via label suppliers). It’s a legal requirement, so it’s part of startup planning to source those labels and compliant materials if needed.

If you plan to do custom-sized kids’ clothing, a set of grading rules or patterns for different ages will be needed. Many designers create in size ranges (e.g. 0-3 months, 3-6 months... up to say size 10).

Learning a bit about standard measurements for children’s sizes in Australia can help you draft or adjust patterns accordingly.

Supplier considerations: 

For children’s fabrics and supplies, Australia has quite a few options.

Spotlight again is a go-to for basics (lots of cotton prints, fleece for winter PJs, etc.), but there are also niche suppliers: for example, Majestic DIY or Little Fabric Boutique are small online stores that specialize in knit fabrics with whimsical prints aimed at children’s wear. 

Bamboo fabric suppliers (like Bamboo Textiles Australia) can supply soft bamboo jersey popular for baby items.

If you are eco-conscious, check out Organic Cotton Plus or local market vendors who sell organic fabrics (some may be imported but warehoused in Australia).

Haberdashery for kids (snaps, elastic) can be sourced through wholesalers like Baby Sewing supplies websites or standard suppliers.

For bulk snaps, a company like Kam Snaps (international) has distributors in Australia, or you can find generic snaps in bulk on eBay/Amazon if they meet standards.

It may also be worth connecting with other kids’ product makers (maybe via Facebook groups or local craft circles) – they often share tips on where to get the best quality child-safe materials.

Pricing & client expectations:

Pricing children’s wear is a balancing act. On one hand, the items are smaller (so one might think they should cost less), but they require just as much skill and often fiddly work.

Also, some customers hesitate to pay too much for kids’ clothes knowing the child will outgrow it quickly.

On the other hand, many parents are willing to pay a premium for special items (like a hand-smocked dress or a cool handmade outfit) especially for occasions or because they value supporting small businesses.

It helps to define your target customer here: are you aiming for the boutique market (higher-end, limited edition pieces for style-conscious parents) or everyday wear at accessible prices? Both can work, but the former allows higher margins.

For example, a handmade girls’ cotton dress might be priced at $40-$80 depending on fabric and complexity, which is more than Kmart but competitive for a “boutique” item.

Custom birthday outfits (say a themed set or a tutu dress) could fetch $100+. 

Be sure to factor in that you might sell in smaller volumes; if you sell online, include costs like Etsy fees or shipping materials in your pricing calculation.

Clients (parents) will expect your products to be durable and wash-friendly. Be upfront about care – if that adorable dress is hand-wash only, mention it (though most kids’ items should ideally be machine washable for practicality).

Manage expectations about sizing too: have clear size charts (maybe include weight/height guidance) to minimize returns.

If you make custom-sized pieces, discuss the measurements with the parent (some may not know how to measure a wriggly child – you might provide guidance).

Branding & marketing:

Children’s wear brands can really have fun with branding – playful names, cute logos, bright colours.

Pick a name that appeals to parents and hints at your style (e.g. “Koala & Roo Kidswear” might suggest Aussie-themed designs; or “Little Sprout Organics” for organic baby clothes).

Visuals are key: show your outfits on actual children if possible (with parent permission of course). Parents love seeing how clothes look on kids.

You might collaborate with local mum bloggers or photographers for lifestyle shots. Social media (Instagram, Facebook) and parenting groups are good avenues to spread the word.

Using keywords like “handmade baby clothes Australia” or “children’s clothing boutique Australia” on your site can attract the right audience.

If your niche is, say, children’s formal wear, make sure to network with photographers or event planners (e.g., someone planning a kids’ fashion show or a baby pageant).

If it’s everyday play clothes, being at local markets or children’s fairs can get you direct sales.

Also consider consignment or wholesaling to gift shops or children’s boutiques; some stores like to carry local handcrafted items on a consignment basis.

Storytelling is effective for this niche: share why you create kids’ clothes – maybe you’re a parent who wanted better options, or you’re passionate about imaginative prints. Many customers buy the story as much as the product.

Emphasise if your products are Australian made and the care you put into each piece.

Challenges & tips:

The children’s market can be price-sensitive for daily wear, so you might find that more expensive items sell slower.

Diversifying your product range could help – for example, offering smaller accessories (like matching scrunchies, hats, or bow ties) at lower price points can attract more customers who later might buy larger items.

Another challenge is that as kids grow, their needs change – what sells for new-borns (e.g. cute baby sets) might not be what pre-schoolers wear. You might end up focusing on a narrower age range where your style fits best.

Also, keep an eye on safety recalls/news in kids’ products; for instance, certain types of drawstrings got banned on children’s clothing because of safety – you need to stay compliant and informed.

From a production standpoint, lots of small pieces can mean lots of time (tiny collars, ruffles, etc., are fiddly).

Good techniques and possibly machinery (like a ruffle foot attachment or an embroidery machine if you plan to add embroidered designs) can save time in the long run.

As with other niches, time management is key: you might be juggling many small orders (5 baby dresses rather than 1 wedding gown, for instance).

Stay organised with order tracking and give yourself achievable deadlines.

Finally, remember to enjoy the creative aspect – children’s fashion is one area you can really inject personality and joy. When customers feel that love and creativity in your products, they’ll come back for more as their kids grow (or for gifts for others).

Sourcing Materials Locally: Haberdashery and Fabric Suppliers in Australia
No matter which niche you choose, one golden rule remains: quality materials lead to quality output.

Sourcing your fabric and haberdashery needs from reputable suppliers ensures your products look professional and last long, which in turn makes clients happy. Australia offers a range of supplier options:

Major Retailers (Spotlight, Lincraft):

These are found in many Australian cities and are a convenient one-stop for fabric, notions, and even sewing machines.

They are great for basics – you can get threads, zippers, interfacing, buttons, elastic, and a decent selection of fabrics from apparel fabrics to special occasion materials.

They often have sales (e.g. 40% off all fabric, or thread packs on discount) which can be a good time to stock up.

The downside is some fabrics might be a bit generic or seasonal, and prices on certain imported fabrics can be high if not on sale. However, for a startup, they’re accessible and you can hand-pick your materials.

Independent Fabric Stores:

Most capital cities have long-standing fabric shops that cater to dressmakers and designers.

These might include high-end importers (selling silks, wools, etc.), discount fabric outlets (with end-of-roll deals), or specialty shops (like quilting cotton stores, bridal fabric boutiques, etc.).

Examples: Tessuti Fabrics (Sydney/Melbourne) as mentioned, The Fabric Store (which has a location in Sydney, Melbourne, Brisbane and specializes in natural fibres, linen, merino, etc.), or local shops like East Coast Fabrics in QLD, Homecraft Textiles in WA, etc.

Shopping in person lets you feel the fabric quality – important for making sure, say, that satin isn’t too flimsy or that cotton isn’t too rough for kids. Build a rapport with store staff – they often give great advice and might offer business customers a discount or wholesale rate if you buy larger quantities.

Online Suppliers and Marketplaces:

There are Australian online marketplaces like Fabric Muse, Super Cheap Fabrics (online), Minerva (though UK-based, it ships to Australia and has a huge range), etc.

Also, consider Etsy for unique hand-dyed or printed fabrics (some Aussie sellers do small batch prints).

For haberdashery, sites like eBay Australia or Amazon AU can be sources for bulk buys (like a box of 100 zippers or snap sets) often at cheaper rates than retail – just ensure the quality by reading reviews or testing a small batch first.

Wholesalers:

If you progress to needing larger quantities, look at wholesalers.

Companies like Kennard & Kennard (Australian wholesale fabric distributors) or Nolan Textiles supply fabrics to businesses.

Some wholesalers have minimum order requirements (like buying a whole roll), so it may be something to use when you’re confident about a fabric choice.

For notions, there are wholesalers who sell things like thread by the box or elastic in bulk reels – this can significantly cut down your cost per item.

Buying wholesale typically requires an ABN and sometimes a business account setup, but as a small business owner you can certainly get those.

Local TAFE or Sewing Groups:

This might sound unusual as a supplier, but sometimes fashion design schools or community sewing groups bulk order supplies and might sell off surplus cheap to members.

If you network in the local sewing community, you might hear about someone selling an unused roll of fabric or a second-hand machine. Keep your ears open!

Also, consider sustainability: sourcing locally not only supports Aussie businesses, it can reduce shipping costs and times. It also gives you bragging rights for marketing (Australian-sourced materials). And if you ever need something urgently, a local supplier is a lifesaver. One sewing business blogger noted that having a supplier who is keen to work with you means you have a real person to contact for questions or special requests – that kind of relationship is more likely when dealing with smaller Aussie businesses than distant overseas factories.

Equipment suppliers: 

For machines and maintenance, build a relationship with your local sewing machine dealer. They’ll help with servicing your machine and might offer trade-ups or deals.

In Australia, dealers like Echidna Sewing (who also do embroidery machines) or brands’ own dealerships (Janome, Bernina etc.) are good contacts.

If a new industrial machine is out of reach, there are services to rent machines – for example, Rent a Sew in Melbourne rents industrial sewing machines from about $45 per week (and domestics around $40/wk.

This could be a great interim solution if you need an industrial machine for a specific project or to test before buying.

Overcoming Challenges in your Sewing Niche
No business is without its hurdles. Here are some common challenges sewing entrepreneurs face and suggestions to overcome them:

Limited Market Size:

By choosing a niche, you inherently narrow your potential customer base.

To ensure you have enough demand, do some homework on how big your niche market is in Australia.

For example, if you want to specialise in plus-size bridal, research how many brides might seek that service and how many competitors exist.

If your local area is small, consider an online or mail-in service to widen your reach (some alteration specialists accept postal alterations, for instance).

Also, differentiate within your niche – offer something unique that draws people even from outside your immediate city.

Expanding your online presence (through a website with good SEO and perhaps offering virtual consultations) can help you reach niche customers across Australia, not just in your town.

Skill Gap or Need for Training:

You might be very good at general sewing but less experienced in the specialized techniques your niche demands.

A bridal specialist needs to know about corset construction, a children’s wear maker should know about safety standards, an alterations expert might need advanced tailoring techniques.

Invest in your skills – consider short courses or workshops. Australia has TAFE courses in fashion tech and plenty of online classes these days (Craftsy, Skillshare, etc.).

You can even seek out a mentor – perhaps intern a few hours a week with a local tailor or designer.

The more you learn, the more confident and efficient you’ll be, which directly impacts the success of your business.

Time Management and Scaling:

Especially when you’re a one-person operation, managing time is tricky.

It’s easy to underestimate how long a project will take. Always buffer extra time for each project until you have a good sense of your pace.

Use tools – even simple spreadsheets or a planner – to track orders and deadlines.

As you grow, consider what tasks you might outsource or streamline.

Maybe bookkeeping can be done by an app or accountant so you spend more time sewing.

Or perhaps cutting fabric for multiple orders at once (batch processing) can save time.

If you get too many orders to handle, it could be time to either raise prices (to select for the best projects) or bring in help.

Hiring even a casual assistant or contracting out some sewing (say, hiring another seamstress for piecework) can increase your output.

It’s a big step, but remember, many fashion businesses start with the founder sewing and then transition to a small team or factory as demand grows.

Financial Juggling:

In the beginning, you might have irregular income – one month a big bridal deposit, next month a slow trickle.

Keep a close eye on finances. List out all your startup costs and ongoing expenses (materials, machine maintenance, marketing, etc.).

Make a business plan or at least a budget. This helps in setting the right prices too; you’ll know your break-even point.

Don’t price too low just to get business – that can lead to burnout and doesn’t necessarily attract loyal customers.

It’s better to compete on quality and uniqueness than on being the cheapest.

Also, be mindful of deposits and payment schedules – for big projects, take a deposit (e.g. 30-50% upfront) so you’re not out-of-pocket on materials and to secure commitment from the client.

Many sewing businesses have faltered by not charging for all the little costs – thread, travel to buy materials, packaging – but those add up. Factor them in.

Building a Client Base:

At first, you might wonder how to get clients beyond friends and family. This is where your marketing efforts and networking are crucial.

Take advantage of free/low-cost marketing: social media (regular posts showcasing your work, behind-the-scenes of your process, testimonials from happy customers), local community boards (sometimes libraries, cafes or community centres let you put a flyer up), and word-of-mouth.

Encourage satisfied customers to leave reviews on your Facebook page or Google listing (if you have one), or simply to tell others.

Possibly offer a referral discount: “Refer a friend and get 10% off your next order.”

Additionally, leverage Australian online communities – there are Facebook groups for local handmade businesses, or even something like the Airtasker platform, where people sometimes seek custom sewing services (just be cautious to price well on those platforms).

Over time, as your portfolio and reputation grow, getting clients becomes easier – the first year or two is usually the hardest hustle.

Emotional and Creative Burnout:

When you turn your hobby into a business, there’s a risk of burnout.

What used to be a relaxing pastime is now tied to deadlines and customer expectations.

Make sure to keep some projects or time for yourself – maybe block out a weekend to experiment with a fun project that isn’t for a client, to rekindle your joy.

Also, connect with peers – join a sewing business forum or local sewing group. Sharing experiences can alleviate stress; you’ll realise others face the same challenges and you can swap solutions.

If dealing with difficult clients is draining you, develop some policies (like how to handle revisions or cancellations) to protect your sanity.

At the end of the day, remember why you started this – love of sewing and a desire for a creative business. Keep sight of that passion, and don’t be afraid to adjust your business model if something isn’t working for you (for example, if doing both bridal and alterations is too much, it’s okay to narrow your services to what you enjoy most or what is most profitable).

Pricing, Client Expectations, and Branding - Getting it Right
We’ve touched on these aspects within each niche, but let’s recap some overarching principles for pricing your services, managing client expectations, and building your brand:

Realistic Pricing:

It cannot be stressed enough – price your work to sustain your business.

A common mistake for new entrepreneurs is under-pricing, either out of fear that clients won’t pay more, or underestimating the time involved.

To set your prices, calculate the cost of materials per item/project, estimate your hours of labour (and set an hourly rate for yourself that you feel is fair for your skill – at minimum above the standard minimum wage; many skilled sewists charge anywhere from $25 to $60+ per hour depending on the complexity), and add a margin for business overheads (electricity, machine wear-and-tear, marketing costs) and profit.

Also consider value-based pricing – if your service is unique or urgent, you can charge more for that value.

For example, express alterations done in 24 hours could have a surcharge.

Or a bridal dress with extremely intricate hand-beading is a luxury service – price it like one.

Always communicate quotes before starting work so the client is on the same page.

It’s helpful to provide a written quote or invoice that outlines what they’re paying for (e.g. materials, labour, any extras) – it makes your pricing more transparent and professional.

Remember the advice: if a potential customer balks at your price (when you know it’s reasonable and in line with your market), they might not be your target customer.

Focus on those who do value your work.

Managing Client Expectations:

Clear, honest communication is your best tool here.

From the get-go, let clients know what is possible and what isn’t.

If a bride comes with a picture of a $15,000 designer gown but has a $2,000 budget, kindly explain the constraints and perhaps suggest modifications to achieve a similar feel within her budget.

If a client wants a pile of alterations done “by tomorrow”, explain your timeline and maybe offer it at a rush fee if you’re willing.

Set boundaries: for instance, your business hours or days for fittings so clients don’t expect you to be available 24/7.

When you take on a project, outline the process for them: “I’ll source materials next week, have a first fitting by this date, and final completion by that date.”

Clients, especially those not familiar with custom sewing, may not understand how much work goes into it – a bit of education can help them appreciate the value and timing.

It’s also wise to have a policy for redos or adjustments: e.g., you’ll do one round of minor adjustments included in the price, but significant design changes after initial agreement would cost extra. Put this politely in your agreement or email confirmations.

Always stay courteous and professional, even if a client is challenging – how you handle a tough situation can often turn them into a loyal supporter if they feel you listened and did your best to meet their needs.

Building a Cohesive Brand:

Your brand is more than just a logo – it’s the impression people have of your business.

It encompasses your business name, visual identity, the tone of voice you use in communications, the look of your work, and customer experience.

For a sewing business, especially one that’s niche-focused, make sure your branding aligns with your niche.

If you’re a bridal seamstress, your branding (from your website design to the way you package a finished gown) should evoke elegance and trustworthiness.

If you run a funky children’s clothing line, your brand might be colourful and whimsical, appealing to kids and parents alike.

Consistency is key: use the same brand name, tagline, and colours across your website, social media, and printed materials (like business cards).

If you’re not design-savvy, there are many templates and tools (like Canva) to help create a decent logo and graphics.

Also, consider branding through storytelling – share your “why.”

Perhaps you could include an “About Me” on your site where you talk about how your grandmother taught you to sew or how you left a corporate job to pursue this passion.

People love authentic stories, and it makes your brand relatable and memorable.

When it comes to branding in person, little details count too – for example, if you have a studio or shop, the décor and ambiance should reflect your brand style (cosy and crafty, or sleek and modern, etc.).

f you’re home-based and have clients visit for fittings, ensure the space is tidy and reflective of professionalism so it reinforces confidence in your brand.

Don’t forget to brand your products and packaging: use those custom labels with your business name on every garment you make.

If you deliver items, maybe include a thank you note with branding, or wrap the product in tissue paper with a logo sticker. These touches make your service feel polished and worth the cost.

Localising Your Brand (Australian context):

Since your target audience is Australian, leverage that in your branding if it makes sense.

Many customers here appreciate locally made goods, so proudly state “Australian Made” or use the Australian Made logo if eligible.

You can also use Australian cultural elements subtly – for instance, a bridal business might highlight being familiar with Australian venues/climates (like “we make dresses perfect for beach weddings or outback weddings alike”), or a kids’ brand might use native animals in its designs.

Use Aussie spelling and lingo appropriately (e.g. use “Mum” not “Mom” if writing content, etc., to resonate locally).

Show that you understand the Australian lifestyle – e.g., resort wear that handles the Aussie sun, or corporate wear that’s breathable for our summer.

This can all set you apart from generic international competition.

Conclusion: Focused Path, Bright Future
In the journey of building a successful sewing business, specialisation can be your best friend.

By choosing a niche – whether it’s becoming the sought-after bridal gown guru, the reliable neighbourhood alterations expert, a bespoke fashion designer, or the creator of adorable children’s outfits – you’re giving your business a clear identity and purpose.

You’ve learned how specialisation offers distinct advantages: it helps sharpen your skills, differentiate your brand, streamline operations, and potentially charge premium prices for your expertise.

We’ve explored several niches common in the Australian sewing industry, each with its own set of requirements and rewards, from the tools you’ll need to the typical client expectations.

Remember that startup costs can be managed smartly: invest in quality equipment (perhaps gradually or even through rentals), source materials savvily (supporting local Australian suppliers where possible), and always keep an eye on the balance sheet.

We’ve also discussed how to tackle challenges – with planning, continual learning, and a supportive network, no hurdle is too big.

Most importantly, we’ve emphasized pricing your work fairly (both to you and the client), setting honest expectations, and building a brand that speaks to your target market.

Starting a sewing business in Australia is as much about passion as it is about planning. With a focused path, you can become not just another seamstress or designer, but the go-to person for your chosen niche.

As you conclude this guide and perhaps feel inspired to take the next step, remember to stay friendly, informative, and supportive in your approach – much like the tone of this article.

The sewing community is a welcoming one, and there’s plenty of room for new entrepreneurs who bring their unique flair to the table. So go ahead and explore that focused path.

Research your niche, make a plan, and dive in. Your future customers are out there looking for exactly what you have to offer – and with the insights you’ve gathered, you’re well on your way to stitching up a thriving, niche-savvy sewing business.

Happy sewing and best of luck on your entrepreneurial journey!
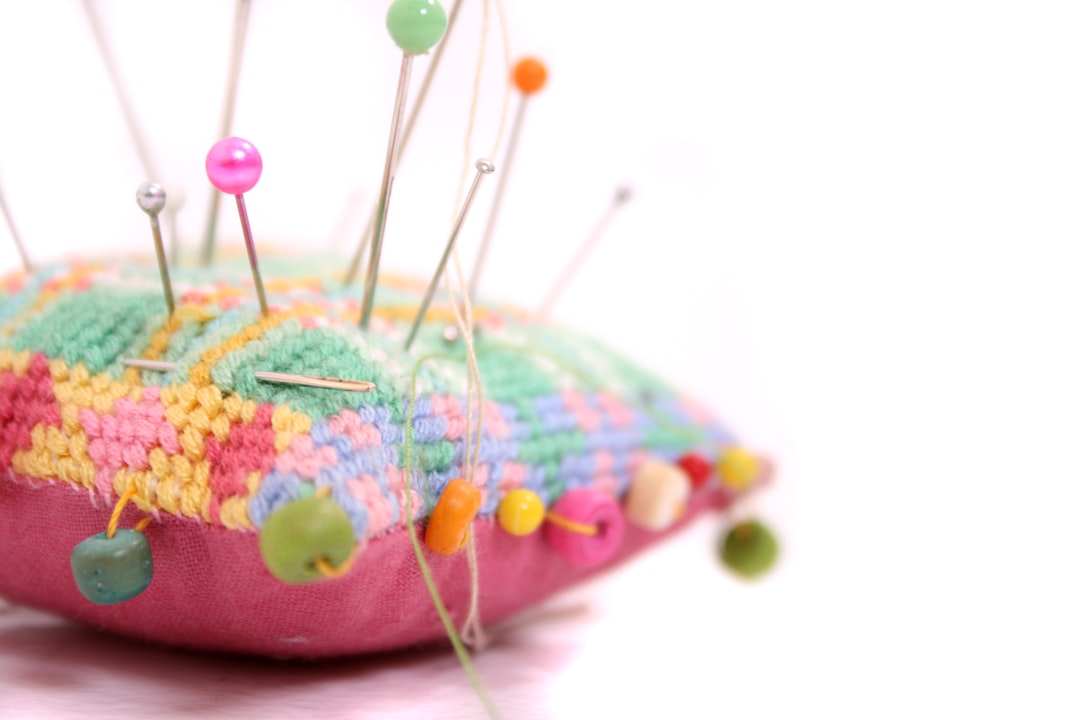
Read More
21 - Sewing as a Business

The Role of the Sewist in the Fashion Design Process

Introduction

Sewists are the unsung heroes of the fashion world - the skilled artisans who bring clothing designs from concept to creation. 

While fashion designers sketch and envision new styles, sewists work behind the scenes (or often right beside the designers and patternmakers: cutting fabric, stitching seams, and perfecting fit to turn those ideas into actual garments.

In the broader fashion design and production process, the role of the sewist is pivotal; without sewists, even the most brilliant design would remain just a drawing on paper. This article introduces what sewists do, how they collaborate with designers and patternmakers, and how you as a sewing enthusiast can develop the skills and experience to turn a sewing hobby into a successful at-home business.

The Sewist's Role in fashion Design & Production

In the fashion industry, a sewist (sometimes called a seamstress/seamster or sewing technician) is responsible for constructing garments and often for helping refine designs through their technical expertise. They transform designers' sketches and patterns into prototype garments and finished products, bridging the gap between creative design and wearable clothing. On any given project, a professional sewist's tasks might include:

  • Interpreting patterns or sketches: Reading and sometimes adjusting patterns, or even drafting patterns for custom pieces.
  • Cutting and sewing fabric pieces: Selecting appropriate fabrics and sewing techniques to assemble the garment.
  • Measuring and fitting: Taking precise measurements of clients or models and conducting fittings to ensure the garment drapes and fits correctly.
  • Making alterations and refinements: Tweaking seams, hems, and other details for comfort and style, and fixing any issues in the sample.
  • Finishing and detailing: Adding zippers, buttons, linings, and doing pressing/ironing for a professional finish.
  • Repair and customisation: In some cases, repairing garments or off-the-rack clothes to client needs.

In short, sewists handle the technical execution of fashion. They often design, create and repair clothing using impressive fashion knowledge and sewing capabilities, whether in a factory setting for mass production or an independent business for custom work.

By producing the actual garments, sewists ensure that fashion designers' ideas can be worn and enjoyed by customers. This production role is a critical part of the overall fashion design process - without skilled sewists (and related roles like patternmakers and sample makers), a design might never make it to the runway or the retail rack.

Collaborating with Fashion Designers and Patternmakers

While designers are responsible for the creative  vision - silhouettes, colours, and artistic direction - sewists contribute practical expertise to bring these visions to life. 

Collaboration between a fashion designer and a sewist is often a two-way street: the designer provides the concept and styling, and the sewist advises on construction, executes the sewing, and offers feedback from a maker's perspective.

Historically, fashion designers and sewists were one and the same - iconic designers of the past (like Charles Frederick Worth or Mary Quant) were also masterful sewists who created their own samples.

In modern times, especially in larger companies, these roles are usually separate but still closely interconnected. For example, in a couture house or small design studio, a designer might sketch a garment and choose fabric, and a patternmaker produces the patterns, but it's the sewist (or a team of sample makers) who will cut the fabric, sew the first prototype, and help refine the piece.

During this process, fashion designers create the sketch, the patternmaker who produces the pattern, but the sewists exists as the do-er to physically realise the idea. They are all creators in their own right - one in concept, one interpreting the design, and the other in execution - and each needs the other for fashion to exist.

How does a sewist complement a designer and patternmaker? Sewists contribute deep knowledge of textiles, garment construction, and fit that can greatly inform the design and patternmaking processes. For instance, a designer might envision a certain dress design and a patternmaker create the architecture, but a sewist can advise if a different seam technique is needed for durability, or if a particular fabric will drape as intended.

Sewists are also often attuned to practical details like sizing and cost. They can guide designers and patternmakers on achieving better fit across various body types and adjust designs to be more cost-effective by suggesting alternative fabrics or construction methods.

In fact, designers often learn from sewists about fit and pricing considerations - a sewist knows how a design translates to real-world materials and what it takes to produce it within a target cost. This kind of feedback is invaluable: it ensure that a design is not only beautiful but also manufacturable and wearable.

In many cases, especially for small fashion labels or home businesses, the sewist, the patternmaker and the designer may be the same person.  If you are an at-home sewing entrepreneur, you might design your own garments, draft the patterns, cut the fabric and then sew them yourself, essentially wearing all the hats. However, even if you only focus on sewing, understanding the designer's and patternmaker's perspectives helps you collaborate better.

Clear communication is key: as a sewist, being able to understand design sketches and patterns, ask the right questions, and possibly even make design suggestions will make you a treasured partner in any fashion project. Remember that the fashion designer's vision comes to life through your skills - as a collaborator, you play a critical role in the creative process of fashion.

Education and Training Pathways for Sewists

One of the great aspects of pursuing a career as a sewist today is that there are many education pathways to build your skills. Whether you prefer formal schooling or hands-on learning, you can tailor your training to fit your goals. Here we outline both formal and informal routes, as well as certifications, that can prepare you for professional sewing work.

Formal Education (Degrees and Diplomas)

Many sewists start with formal training in fashion or apparel design. You might pursue an associate or bachelor's degree in fashion design, fashion technology, or apparel production.

These programs typically cover patternmaking, garment construction, textiles, and fashion history.

There are also vocational programs and community college courses focused specifically on sewing and tailoring. Such programs often take one to two years and focus on improving technical skills, such as fittings and alterations, clothing creation, fabric selection and more.

Upon completion, you usually receive a diploma or certificate and have created a portfolio of projects which can help when seeking employment. 

Formal education provides a structured curriculum and often access to industry equipment and internships, which can be very beneficial.

Informal Learning (Self-Taught and Workshops)

Not all professional sewists go through college programs. Plenty of successful sewists are self-taught or learn through informal means.

If you're motivated, you can learn the trade by combining resources like books, online tutorials, and good old trial-and-error at your sewing machine.

Start with the basics (operating a sewing machine, understanding patterns, basic stitches) and gradually move to advanced techniques (like draping, couture methods, etc.) 

There are countless YouTube tutorials, sewing blogs, and online classes for every skill level.

Additionally, consider local resources: community centres, fabric stores, or sewing machine dealers often host sewing classes and workshops for various skillsets.

The key is consistent practice. As one career guide notes: "Developing crucial technical skills through practice or training - measuring, cutting fabric, using sewing tools, etc. - is an important first step before pursuing a sewing career".

If you're teaching yourself, set a curriculum (for example, work through a beginner sewing book or online course) to ensure you build a strong foundation in all the essentials.

Apprenticeships and On-The-Job Training

Another excellent pathway is learning by working under experienced professionals.

You might start in an entry-level role at a tailor shop or costume/fashion studio, or even as a sewing machine operator in a production setting, to pick up practical skills.

An apprenticeship (formal or informal) means you get mentorship from a seasoned sewist or tailor. This hands-on training is invaluable - you learn the real-world operations of professional sewing businesses and get on-the-job training, which helps you understand how a shop runs and how to work efficiently.

Over time, an apprenticeship can greatly improve your technical skills and even lead to a job offer.

While not always required, working closely with a professional seamstress or seamster, allows them to relay their knowledge and skillset so you can accelerate your learning.

If you have the chance to apprentice or even just assist in a local design house or alterations shop, take it! 

It can also be a networking opportunity in the industry.

Professional Certifications

Although not mandatory, certifications can enhance your credibility if you plan to turn professional. 

There are organisations (like the Association of Sewing and Design Professionals (ADSP) in the USA) that offer certification programs for sewing professionals. For example, the ASDP offers the Master Sewing and Design Professional (MSDP) and Master Alteration Specialist (MAS) certifications which are national, performance-based programs to certify advanced sewing and design skills.

In Australia and New Zealand, sewing certifications typically involve completing vocational education courses such as Certificate II or III in Apparel, Fashion and Textiles or similar qualifications. These programs equip individuals with skills in sewing, patternmaking, and working with fabrics. In Australia, the Australian Qualifications Framework (AQWF) is used, while New Zealand Qualifications Framework (NZQF) is used in New Zealand.


In the UK, sewing certifications can range from basic beginner courses to more advanced diploma programs and teacher training. Some options include online courses offering QLS or CPD certificates, while others offer more in-depth qualifications like Diplomas in Dressmaking or sewing for business. For those looking to teach, Palmer/Pletsch offers a certification program for sewing instructors. 

These programs test a sewist's knowledge in key areas like fabric, design, fashion illustration, fit, garment construction, pattern development and professional practices.

Earning such credentials is a way to validate your expertise and can be a prestigious addition to your resume - it signals to clients or employers that you uphold high standards of workmanship and have proven skills.

Aside from these, there may be local or online certificate courses (for example, in specific skills like bridal, tailoring, or industrial sewing).

While you don't need certification to be a successful sewist, if you enjoy structured learning and want a credential, these are some of the options to consider.


In summary, your education as a sewist can be pieced together from various sources. Some people combine approaches - e.g., take a few courses for fundamentals, then learn specialised techniques from a mentor, and perhaps later get a certification in a niche skill.

What matters most is that you achieve proficiency in sewing techniques and garment construction, and build a strong portfolio of work (more on that shortly).

Choose the path that fits your life, budget and learning style. Whether through a university fashion program or countless late nights sewing at home, every bit of knowledge and practice will contribute to your growth as a professional sewist.

Essential technical and Creative Skills for Success

To thrive as a sewist in the fashion industry, you'll need to develop a blend of technical prowess and creative insight. Sewing for others (and eventually for paying clients) requires more than just basic stitch knowedge - you must truly master your craft. 

Below are some of the key skills and competencies that successful sewists cultivate.

Pattern Reading and Garment Construction

The ability to read and interpret sewing patterns is fundamental.

As a sewist, you should be comfortable working with commercial patterns (with all their notches and instructions) and also be able to work from a designer's custom pattern or draping.

Over time, you may also learn pattern drafting - creating or adjusting patterns yourself to achieve a desired design or fit. 

Mastering garment construction techniques (seams, darts, pleats, linings, etc.) is part of this skill set. 

A strong understanding of these building blocks of clothing enables you to tackle a wide range of projects and to troubleshoot when something in the assembly isn't working. In fact, having a strong understanding of sewing knowledge and skills is imperative to perform the job well. The more you sew different patterns and styles, the more intuitive construction will become.

Fabric and Material Knowledge

A sewist must become friends with fabrics. Different textiles behave very differently - consider the contrast between a slinky silk satin and a sturdy denim.

Knowing how fabrics, drape, stretch, fray, or take to pressing will guide you in choosing the right material for a project and adjusting techniques accordingly. For example, you'll handle a knit fabric (which stretches) in a different way than a non-stretch woven fabric.

You should also learn about interfacing, linings, thread types, trims, and much more.

This textile knowledge often comes from experience and research (don't be afraid to do burn tests or stretch tests on fabric swatches to understand them).

A designer (or commercial pattern instructions) might specify a certain fabric for a garment - it's the sewist's job to know how to cut and sew that material properly, or to suggest a better alternative if needed.

Over time, you'll also get familiar with sourcing quality materials within budget, a skill that adds value especially if you run your own business.

Machine Operation and Sewing Techniques

Proficiency with your tools - especially your sewing machine (and other equipment like sergers/overlockers, coverstitch machines, or industrial machines if you use them) is essential. You should know your machine's functions and how to maintain it (cleaning, oiling, changing needles) to avoid downtime.

Similarly, understanding various stitch types and seams (e.g., French seam, flat-fell seam, blind hem) and knowing when to use them will improve the professionalism of your work.

Skilled sewists also handle pressing tools well: ironing and pressing at each stage of construction is key to a crisp final product.

Essentially, the sewing machine is an extension of your hands - practice controlling fabric feed, sewing straight and curved lines accurately, and using any attachments (buttonholer, zipper foot) proficiently.

If you get into specialised areas, you may need other tools (for example, embroidery machines or tufting tools), but for garment sewing, a solid-all-purpose machine and overlocker, and the skills to use them expertly, will cover most needs. 

Fit and Alteration Skills

One area that distinguishes professional sewists is the ability to achieve a great fit. This means you need to understand body measurements, shaping garments through darts or seam adjustments, and common fitting adjustments (like modifying a pattern for a fuller bust, adjusting shoulder width, lengthening or shortening patterns, etc.).

Being skilled in alterations is incredibly useful - whether you're making a custom piece from scratch or tweaking an existing garment, knowing how to analyse fit problems and solve them is crucial.

You should practice fitting garments on real people (friends or clients), as this hands-on experience teaches you how to pin and adjust for comfort and look. Clients will especially appreciate a sewist who can not only sew a garment but also tailor it perfectly to their body.

Attention to Detail and Quality Control

Sewing professionally requires a keen eye for detail. Small mistakes like uneven topstitching, misaligned seam junctions, or rough finishing can detract from the quality of a garment.

Cultivate the habit of doublechecking your work and being meticulous. For instance, when cutting, make sure grainlines are straight; when sewing, maintain consistent seam allowances; when finishing, trim loose threads and press seams flat. This attention to detail goes a long way in producing polished, boutique-quality items.

As noted in one resource, having impeccable attention to detail helps you catch any sewing or cutting mistakes and ensure everything matches the design specs. It also means following instructions carefully and keeping accurate measurements.

Quality control is especially important if you plan to sell your work - customers notice craftsmanship!

Creativity and Problem-Solving

Sewing is both a technical and a creative pursuit.

Creativity will help you find unique solutions when you encounter challenges (and you will encounter them!).

Maybe you need to substitute a trim that's out of stock, or the fabric isn't behaving as expected - a creative sewist can improvise and still achieve the desired look.

Strong problem-solving skills are important for dealing with the unexpected issues that arise in making garments. For example, if a garment doesn't fit as envisioned, you might add an extra seam or decorative element to fix the issue and make it appear intentional. This kind of on-the-fly thinking develops with experience.

Additionally, creativity is what makes sewing fun and personal - even if you're working from someone else's design, your artistic touch in how you execute stitching or finishes can shine through. Embrace that artistic side, whether it's picking up a particularly beautiful lining fabric or finding a clever way to upcycle leftover scraps into the design.

Communication and Customer Service

If you aim to work directly with clients (or with a designer as a collaborator), communication is a key skill as well.

You should be able to listen to what a client wants and explain what can or can't be done in a tactful way.

Guiding a customer through fabric choices or design tweaks requires patience and clarity.

Good communication also matters if you're teaming up with designers - understanding their vision and providing feedback in a respectful, constructive manner.

Many successful at-home sewists also have to provide great customer service: this can mean being responsive, meeting deadlines, and making the experience pleasant so that clients will recommend you to others. It might not be a 'technical' sewing skill, but it's certainly important for sustaining a sewing business.


As a newcomer, don't be daunted by this long list. You don't need to be an expert in everything at once. These skills develop over time with education and practice. The journey of mastering them is part of what makes sewing a rewarding craft.

Focus on building a strong foundation of the basics - tools, fabrics, accurate sewing - and then keep adding to your skillset.

In the fashion industry, you'll never stop learning, whether it's a new sewing technique or a trend in fabrics. With each project you'll gain experience and confidence in these essential skills.

Hands-On Experience: Building a Portfolio and Gaining Clients

No matter how much coursework or self-study you have, nothing replaces hands-on experience in sewing.

Sewing is a craft where you learn by doing - each project teaches you something new or helps refine your technique.

If you aspire to turn professional, gaining real experience is not only personally enriching but also something future clients or employers will look for.

One of the first benefits of hands-on experience is building a strong portfolio of your work. In creative fields like fashion, a portfolio is often more important than a resume. It's a collection of examples that show what you can do - and it speaks louder than words.

As you complete sewing projects, take quality photos of the finished garments. Include a variety of pieces in your portfolio: perhaps a dress you made, a tailored jacket, a pair of custom-fit pants, or before-and-after images of a complicated alteration. If you studied formally, you might already have a portfolio from school (often including photos of custom garments and even sketches of designs you've made). If not, you can build one on your own by sewing for yourself, friends, or small freelance projects.

Over time, your portfolio will demonstrate your range and growth. Make sure it highlights your best work and things you want to be hired to do. For instance, if you love evening gowns, include that; if you excel in alterations, show dramatic fixes.

How do you get those first projects and clients? Often, it starts with your immediate network. You might volunteer to sew a costume for a local play, alter a bridesmaid dress for a friend, or make a custom shirt for a family member.

Even if you charge only a minimal fee (or nothing at first) to build experience, treat these initial projects professionally - the results and word-of-mouth can lead to paying clients. As you gain confidence, start charging fair prices for your work.

You can also look for entry-level jobs that provide experience: working in a bridal alterations boutique, for example, will teach you a lot about fitting formalwear and dealing with customers.

Some sewists take on small contract jobs (for local designers or Etsy shop owners who need sewing help) to build their resume.

Every bit of experience counts and becomes a story you can tell future clients (Yes, I've installed dozens of invisible zippers - I mastered that while working at a gown shop, for example).

When showcasing your portfolio and trying to gain clients, presentation and marketing matter. Consider creating a simple website or social media page for your sewing business where you can display photos of your work.

In today's digital age, having an online presence is extremely helpful. A professional website acts as your online storefront and allows potential clients to learn more about your services, view your portfolio, and even make inquiries easily.

Use social media platforms like Instagram, Pinterest of Facebook to share your latest projects and behind-the-scenes looks at your process - this not only demonstrates your skill but also your passion and professionalism.

Engaging with local community events can help too: for instance participate in a craft fair or a local fashion show to get your name out there.

Networking through sewing circles, the American Sewing Guild (ASG), the Australian Sewing Guild (AUSSEW), or fashion meetups can connect you to people who may need your services or who can refer clients to you.

Importantly, hands-on experience also builds your reputation - something that is priceless in an at-home sewing business. Happy clients will recommend you to others.

As you accumulate successful projects, ask clients for testimonials or permission to share before-and-after examples of your work.

Over time, you'll establish yourself as a reliable sewist in your community or niche.

Keep in mind that the fashion industry values experience greatly. According to the U.S. Bureau of Labor Statistics, the job outlook for sewing professionals is modest, but those who continuously improve their technical skills and build a strong creative portfolio have better chances of finding opportunities.

Note: Check out the Australian Fashion Council economic report here.

This indicates that your proactive efforts in gaining experience and showcasing your talents can truly pay off. Whether your goal is to freelance, start a boutique, or work for a designer, a combination of real-world experience and a solid portfolio will open doors.

Real-World Applications and Opportunities for Sewists

One exciting aspect of becoming a sewist today is the diverse array of real-world applications for your skills. With the rise of small brands, online marketplaces, and a DIY craft culture, skilled sewists are in demand for various projects. Here area a few avenues where sewists play a key role.

Custom Garment Creation

This is the classic role of a seamstress/tailor - making one-of-a kind clothing for individual clients. If you enjoy working one-on-one, you can create custom garments like wedding dresses, prom gowns, suits, or everyday wear tailored exactly to a clients measurements and preferences.

Customers love the personal fit and uniqueness of custom-made clothing. As a sewist, you'd handle everything from consulting on the design, choosing fabrics, taking measurements, creating the pattern, and sewing the garment to perfection.

It's a rewarding process because you see a garment through from start to finish and make someone's vision (or your own design) come true.

Bespoke tailoring and dressmaking can be a lucrative niche once you build a reputation for quality. Even in an era of mass production, many people seek out custom clothing for special occasions or for fit reasons, so there's a meaningful market for this service.

Small-Batch Production for Independent Designers

Not all fashion is produced in large factories. Many independent fashion designers or boutique brands produce limited quantities of their designs - and they often need skilled sewists to do this small-scale manufacturing.

If you prefer working on design collections rather than individual client commissions, you could partner with a designer (or be a designer yourself) and handle the small-batch production of a line of garments.

Small-batch generally means producing a limited run of each design (for example 10 - 50 pieces rather than thousands) and prioritising quality. As a sewist, you might be sewing multiple copies of the same design in different sizes. This requires efficiency and consistency in your work.

The advantage of small-batch is that it allows emerging designers to produce locally and maintain quality control, and it gives sewists the opportunity to work on a variety of designs each season. You become an important part of that designer's supply chain - essentially the production department for their brand.

This can even be an at-home operation if you have a robust sewing setup.

It's worth noting that many start-up fashion labels are willing to work with freelance or home-based sewists for their first collections. By doing small-batch production, you contribute to the fashion ecosystem by helping new styles reach the market without the need for large factories.

Alterations and Repairs

Almost every community has a need for alteration experts. From hemming trousers and adjusting the fit of jackets, to modifying bridal gowns, alterations are a steady source of work for many sewists.

Running an alterations service can be a great way to start a home-based business - it has lower material costs (since clients bring you existing garments to fix) and it addresses a common need.

Don't underestimate the value of being skilled in alterations: clothes off the rack rarely fit everyone perfectly, and people are willing to pay to make their clothing look and feel better.

As an alteration specialist, you might also handle clothing repairs (mending tears, replacing zippers) which is another important service.

Some sewists make a full-time living with alterations alone (for instance, focusing on wedding dress alterations, which are highly specialised.

Even if you want to do original sewing, offering alterations can bring in clients and income while you build up other parts of your business.

It's also an excellent way to hone your fitting skills, because you see how garments from various brands are constructed and how to improve them.


Beyond these examples, sewists find many other applications:

  • Costume design and sewing for theatre or cosplay communities.
  • Home décor sewing (like draperies, cushions, slipcovers).
  • Teach sewing classes or workshops.
  • Making and selling handcrafted items (bags, accessories, children's clothing) on platforms like Etsy, and more.

Whether you dream of creating one-of-a-kind garments or providing alterations and repairs, a sewing business offers endless opportunities to showcase your skills. The key is to find your niche or the mix of services that you enjoy and that has market demand.

When starting out, you might try a bit of everything to see what you enjoy most and what clients respond to. Some at-home sewists begin with alterations for income, while slowly launching a custom clothing line as their passion project.

Others might collaborate with a local designer from the beginning.

There's no single correct path - the fashion design process can take many forms, from a couture atelier to a home studio.

What all these avenues have in common is that they rely on the sewist's skill to deliver a quality product. Every garment that gets sold or worn has passed through the skilled hands of someone who made it. By developing your craft, you open up these various professional opportunities for yourself in the world of fashion.

Conclusion: From Hobbyist to professional - You Can Do It!

Turning your love of sewing into a fashion career is an exciting journey. As we've explored, the role of a sewist is integral to the fashion design process - you are the person who makes fashion tangible.

For newcomers dreaming of starting an at-home sewing business, know that every expert sewist started somewhere. Today, you might be sewing simple skirts or mending clothes as a hobby; next year, you could be collaborating with a fashion designer on their new collection or delighting a client with a custom outfit that fits them perfectly.

The transition from hobbyist to professional sewist will require dedication, practice, and learning, but it is absolutely achievable. Start by building your skills and knowledge step-by-step, and don't be afraid to seek education (be it a class, a degree, or an online tutorial series).

Embrace each project as a learning opportunity and gradually take on more challenging tasks - this is how you grow.

Also engage with the sewing community: join sewing groups or forums, attend local fashion events, or become a member of organisations like the Australian Sewing Guild to meet like-minded people. Networking can open doors and also provide you with support and advice as you progress.

When you feel the time is right, take the leap into doing work for others. Maybe it's a paid alteration job or a custom commission - treat it professionally and see how it feels.

With each happy client and each beautiful garment you produce, your confidence will build.

Remember to keep updating your portfolio and resumé with these experiences.

Over time, what once was a hobby in your spare room could flourish into a full-fledge at-home business. Many successful sewing entrepreneurs will tell you that the beginning is the hardest part - but also the most exciting, because every new client or project is a milestone.

Finally, stay inspired. fashion is constantly evolving, and as a sewist, you get to be a part of that dynamic world. Continue to follow fashion trends, but also hone your personal style and strengths

Maybe you'll become known for your impeccable tailoring, or for using sustainable materials, or for stunning evening gowns - lean into what you love.

Your passion for sewing is your greatest asset. It's the drive that will keep you practicing late into the night or experimenting with a tricky technique until you master it.

That passion, combined with the knowledge and skills you acquire, will propel you forward.

In conclusion, the role of the sewist in the fashion design process is both crucial and rewarding, blending creativity with technical skill. Whether you're collaborating with designers or crafting your own collections, you have the power to turn ideas into wearable art.

So keep learning, keep sewing, and keep believing in yourself. With patience and perseverance, you can transform your sewing hobby into a thriving professional career - and help shape the fashion of the future, one stitch at a time.

Read More
Illustration of a woman at a sewing machine
01 - General

The Evolution of Fashion Sewing: From Ancient Threads to Modern Trends

Introduction

Fashion sewing, an essential craft that intertwines functionality, art, and self-expression, has been integral to human societies throughout history.

From rudimentary needlework in ancient civilizations to contemporary sewing techniques powered by advanced technology, the practice of fashion sewing has continually evolved, reflecting changes in society, technology, and cultural tastes.

In this exploration, we journey through time, tracing the progression of sewing from its earliest origins to today's innovative and sustainable methods.

Ancient Beginnings

Sewing can be traced back tens of thousands of years, beginning as a fundamental survival skill rather than an art form. Archaeological discoveries, such as bone needles dating back approximately 60,000 years, reveal the primitive yet critical necessity of sewing. Early humans sewed animal hides together for warmth and protection, using sharpened bones as needles and animal sinew as thread.

As societies advanced, so did sewing techniques. Ancient civilizations like Egypt, Mesopotamia, and China demonstrated more intricate sewing skills. Egyptian tomb paintings depict finely tailored garments and elaborate embroidery. Silk production and sewing in ancient China reflected an early sophistication, influencing global textile trade and garment creation.

Medieval and Renaissance Sewing

The Middle Ages and Renaissance periods significantly expanded sewing's cultural significance.


Tailors became specialized craftsmen, particularly prominent in medieval Europe, producing custom-fitted garments primarily for the wealthy elite.


Garments were often hand-stitched meticulously, reflecting one's social status through luxurious fabrics and elaborate designs.


During the Renaissance, sewing became an art form, with rich embroidery and decorative stitches embellishing clothing.


Techniques such as quilting, applique, and lace-making emerged, highlighting the skill and artistry of sewists who contributed significantly to fashion and costume history.

Industrial Revolution: Sewing Transformed

The Industrial Revolution marked a profound turning point for fashion sewing, introducing mechanical innovation that drastically increased production speed and volume.

In 1790, Thomas Saint patented the first sewing machine design, though it was not practically realized. Later, in 1846, Elias Howe successfully developed a practical sewing machine, revolutionizing garment manufacturing.

Isaac Singer further enhanced sewing technology with a foot-pedal-powered machine in 1851, making sewing machines accessible for household use.

These inventions radically transformed garment production, transitioning it from artisanal hand sewing to mass manufacturing, significantly influencing fashion trends and making clothing more affordable and accessible.

20th Century: Fashion Sewing Goes Mainstream

Throughout the 20th century, sewing evolved from a necessary household skill to a popular hobby and creative outlet.

Home sewing patterns, introduced by companies like Butterick and Vogue, became widely accessible, empowering individuals to create fashionable clothing at home.

The emergence of ready-to-wear fashion did not diminish sewing’s appeal; instead, sewing provided a means of personalization, customization, and economic savings.

During World Wars I and II, sewing took on renewed importance due to fabric rationing and economic hardship, encouraging resourcefulness and creativity. Sewing allowed individuals to mend, repurpose, and create clothing, maintaining fashion and personal style despite challenging times.

Modern Sewing Innovations

Today, fashion sewing integrates advanced technologies, significantly impacting techniques and outcomes.

Computerized sewing machines offer precision stitching, embroidery, and numerous automatic functions, enhancing both quality and efficiency.

Innovations such as sergers (overlockers) and coverstitch machines further professionalize home sewing.

Contemporary fashion sewing also embraces digital patternmaking, 3D body scanning, and virtual fitting technology, allowing unprecedented personalization and accuracy.

These advancements make fashion sewing more accessible and enjoyable for both beginners and professionals, continually expanding creative possibilities.

Sustainability: The New Frontier

In the modern fashion world, sustainability has emerged as a critical concern, transforming sewing practices.


Slow fashion, upcycling, and DIY movements promote sewing as a sustainable, ethical alternative to fast fashion.


Sewists today emphasize quality, craftsmanship, and eco-friendly materials, reflecting growing awareness about fashion's environmental impact.


Sustainable sewing involves practices like repairing, repurposing old garments, and choosing environmentally responsible fabrics.


This movement reconnects modern sewing with its historical roots in resourcefulness and necessity, highlighting the cyclical nature of fashion trends and sewing practices.

Sewing as Expression and Empowerment

Sewing continues to serve as a profound expression of personal identity, creativity, and empowerment.

In contemporary culture, sewing is celebrated through social media platforms, online communities, and instructional resources, making it easier than ever to learn and engage in sewing.

Fashion sewing empowers individuals to challenge mass-produced fashion norms, fostering personal style and creative expression.

For many, sewing is not only a practical skill but also a therapeutic, fulfilling activity, creating communities of shared interests and support around the globe.

Conclusion

The evolution of fashion sewing reflects humanity's journey from basic survival to expressive artistry and sustainability.

As we trace this transformation, we witness a craft continually reshaped by innovation, societal shifts, and cultural values.

Fashion sewing, deeply woven into our history, remains relevant today, adapting to contemporary needs while preserving timeless skills and traditions.

Whether through technological advancement, sustainable practices, or creative expression, sewing remains a fundamental and cherished aspect of human culture, evolving yet enduring through the fabric of time.

Read More